
How To Build Quick And Easy Raised Garden Beds

I can feel spring in the air. The days are growing longer, buds are returning to trees and the cocoon of winter seems to be breaking. I can feel it in each sunny day, each blue sky and the dafodils - or “buttercups” as they are called here in the South - that line the roads. The promise of new life is just ahead and I find myself eagerly awaiting its return. Especially this year. We are finally staring our gardens - that we have been waiting to plant for 4 years.
It is such an exciting time for our family, for Craig and me especially. You see, this is what we have worked toward since selling our house in 2020 to begin a farm of our own. If you have followed along with our journey, you may know that this has been a very long process for us. You can hop back in the blog and learn a bit more in my posts where I shared all about it in real time My Three Year Journey That Changed Me, Building Cedar Grove Farm, Breaking the Silence of a Hard Season and We Are Moving To Nashville.
But this year…it is finally happening. We may not be living on the acreage we envisioned or plan to have in the future, but we have a sweet little spot here in Middle Tennessee on just shy of an acre - and that, my friend, is enough to grow an abundance! And so…here we go!
We have had small gardens in our backyards many times in the past years, but this time, it will be different. We are working toward building the farm we have dreamed of for so long and planned for for years. When we sold our house and were working through building plans on our farm in Bellingham, WA, we spent ALL of our free time pouring into every book, podcast, website and resource that would teach us how to grow things successfully.
We’ve learned so much about garden planning and companion planting, hardiness zones, organic fertilizer, starting seeds, pinching flowers, building gardens, ammending soil, pest control and so much more. I think we have the basics to start some pretty great gardens in our heads - now we get to put it to practice. And mind you, we did a lot of this research in WA state as it pertains to gardening there. Now, we have taken a deep dive again into learning all about gardening successfully here in the South - where hot and humid summers, different bugs and longer growing seasons are prevalent and we are trying our best to learn it all.
We know it won’t happen over night and we will learn about a gazillion things this first year. However, we both know this is what we are supposed to do and so we are so darn excited to dive in and make it happen. We have spent the past month building our raised garden beds and starting seeds. I’ve had many people ask about how we are doing it and so I wanted to put together a little tutorial on building our raised beds in case you might find it helpful too!
Why Raised Beds?
We debated doing in-ground beds or raised beds and decided to go with raised beds for a few reasons. The biggest reason being the control we would have over the soil quality. The soil here in our area is very clay-like and hard. Rock is very prevalent and we wanted to ensure we had a little more control over the base of what our plants would be growing in. After all, good soil is the absolute foundation of healthy plants.
A second benefit to raised beds is the ability to design them in a way that is really beautiful as a whole and create a layout that makes sense in the area we have, while being able to practice high density planting and high yield crops. Lastly, raised beds are a little easier on the body when it comes to weeding and harvesting.
The Planning

Before getting busy building, we mapped out the layout of all of our gardens on graph paper to ensure we had a good plan. To do so we broke down what produce we wanted to grow to feed our family, the flowers we wanted to harvest and the quantities of each. We decided what we would grow in each bed and the necessary quantity of plants needed to produce the desired yield of each item. We mapped out the area we had for the beds and then mapped out the plant spacing in each individual garden. We are doing companion planting and so made sure that each crop we plant is planted with another that will help it thrive.
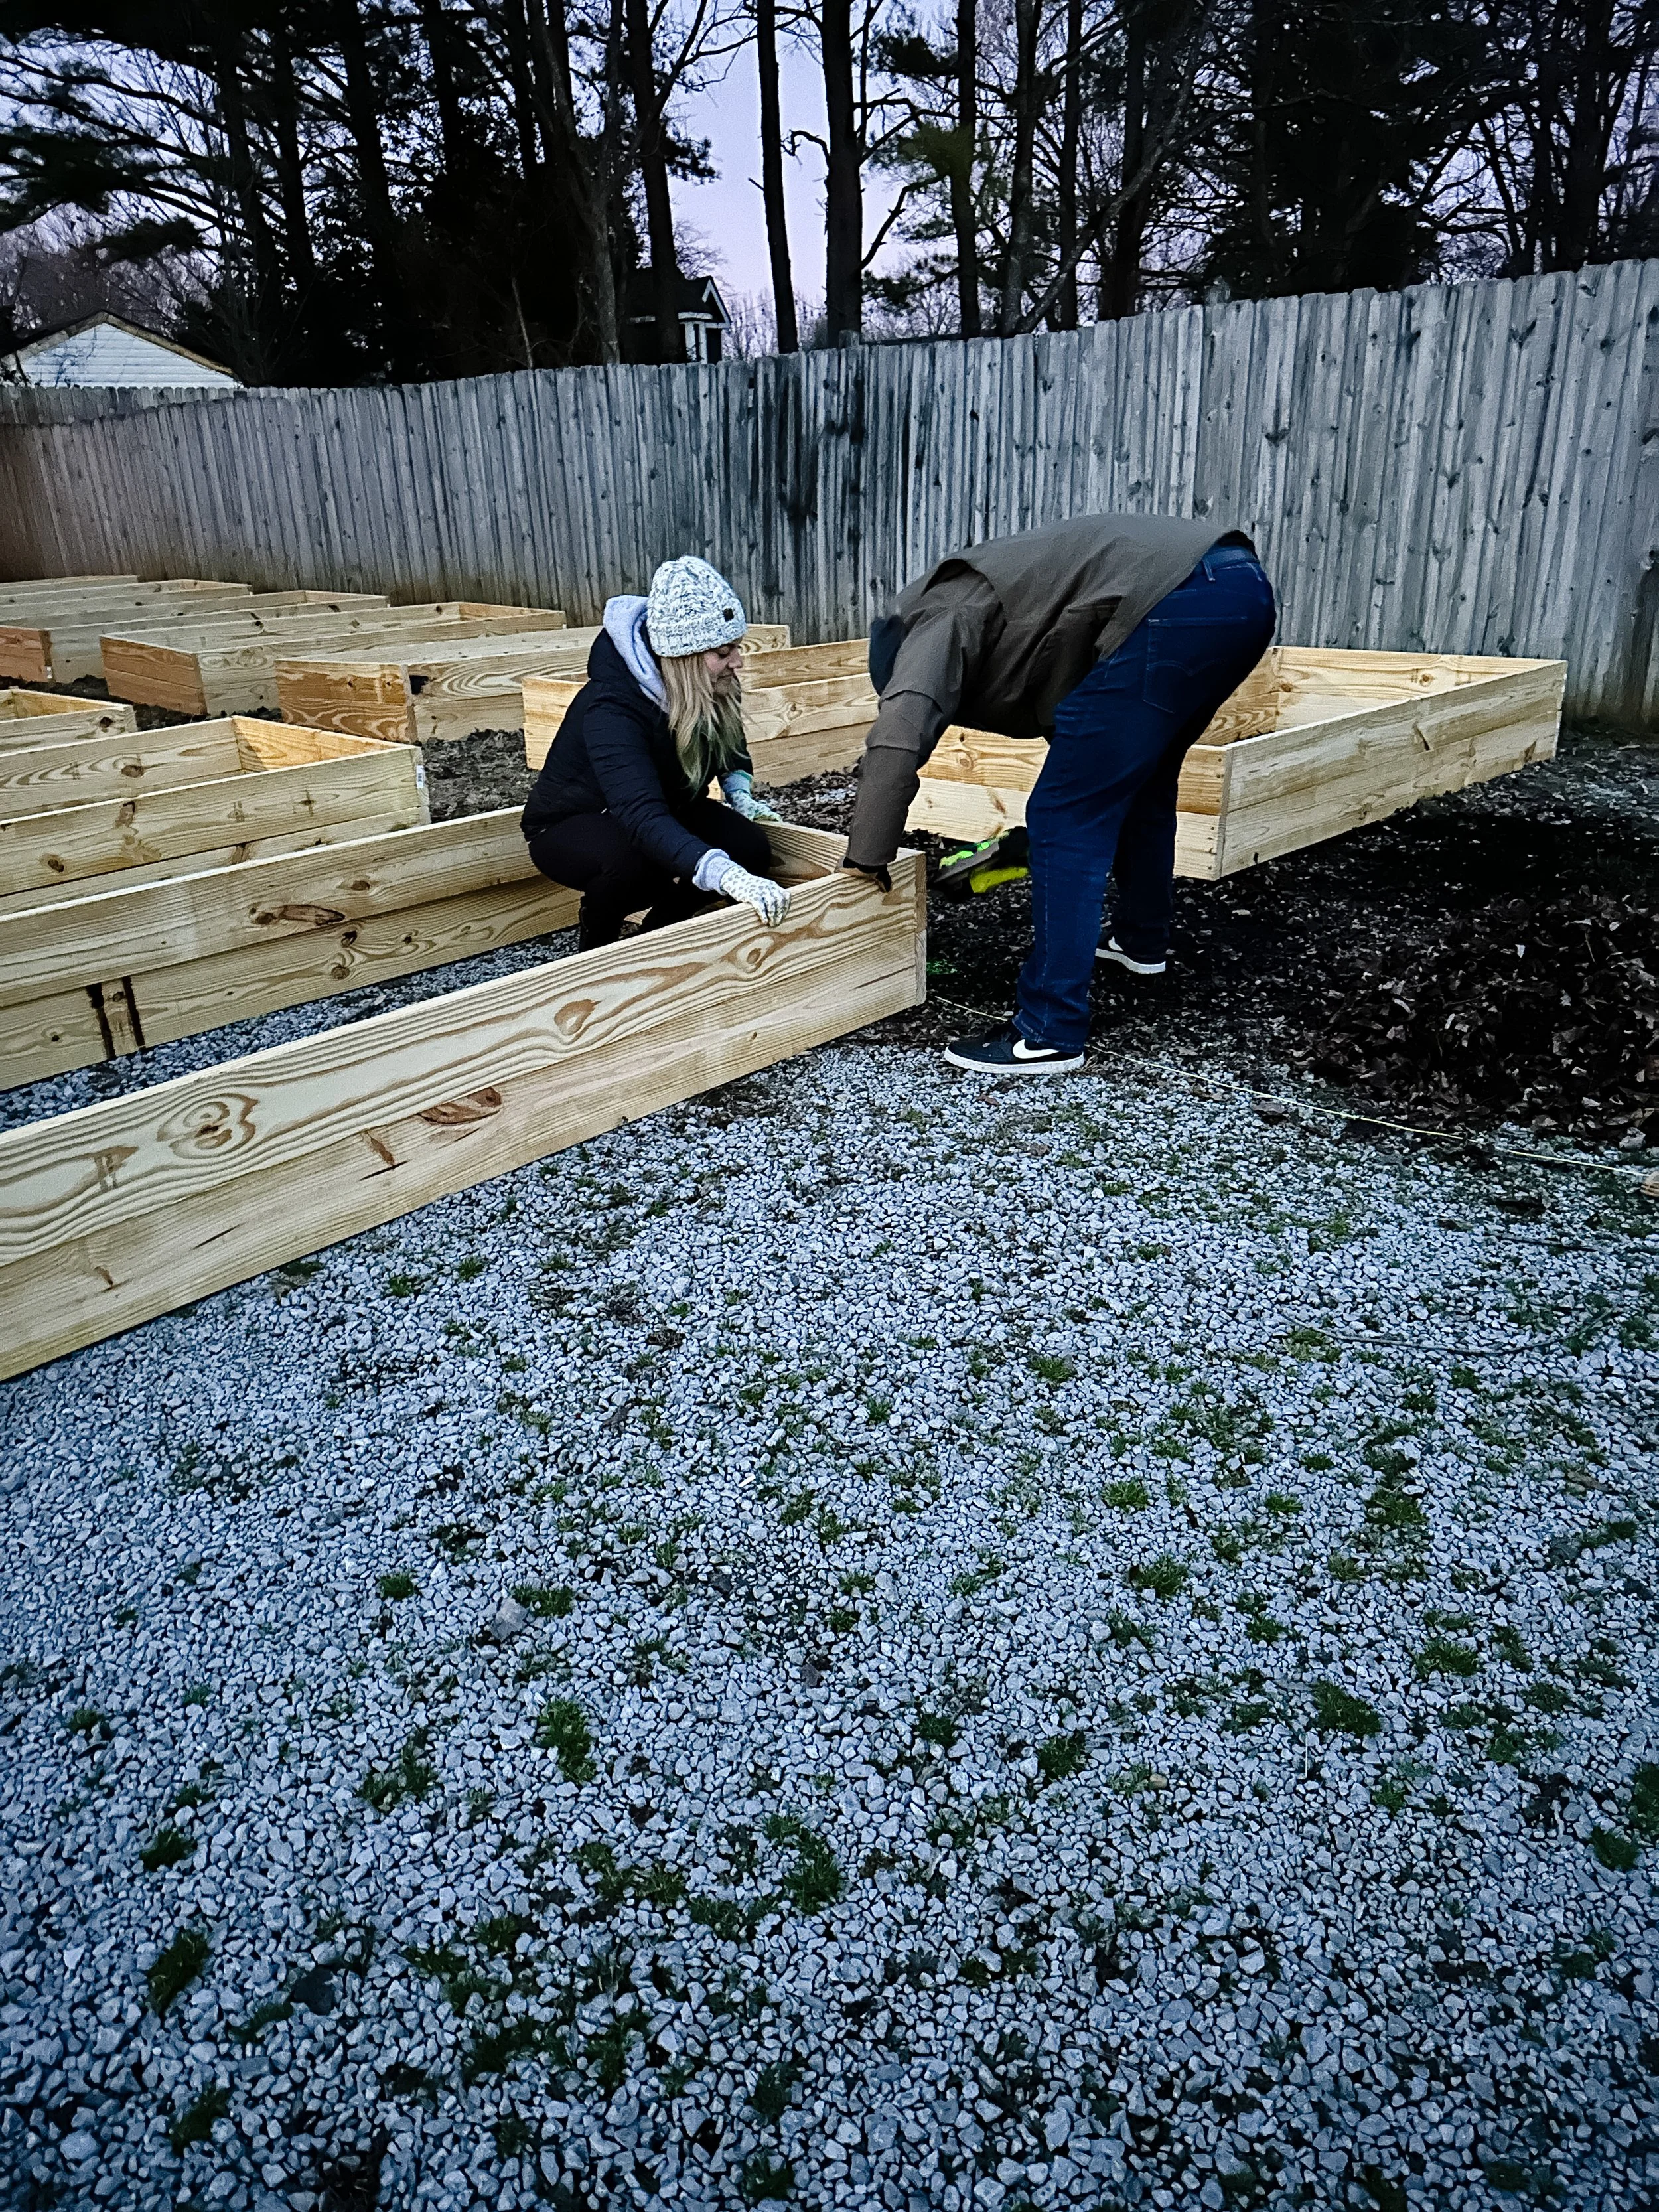
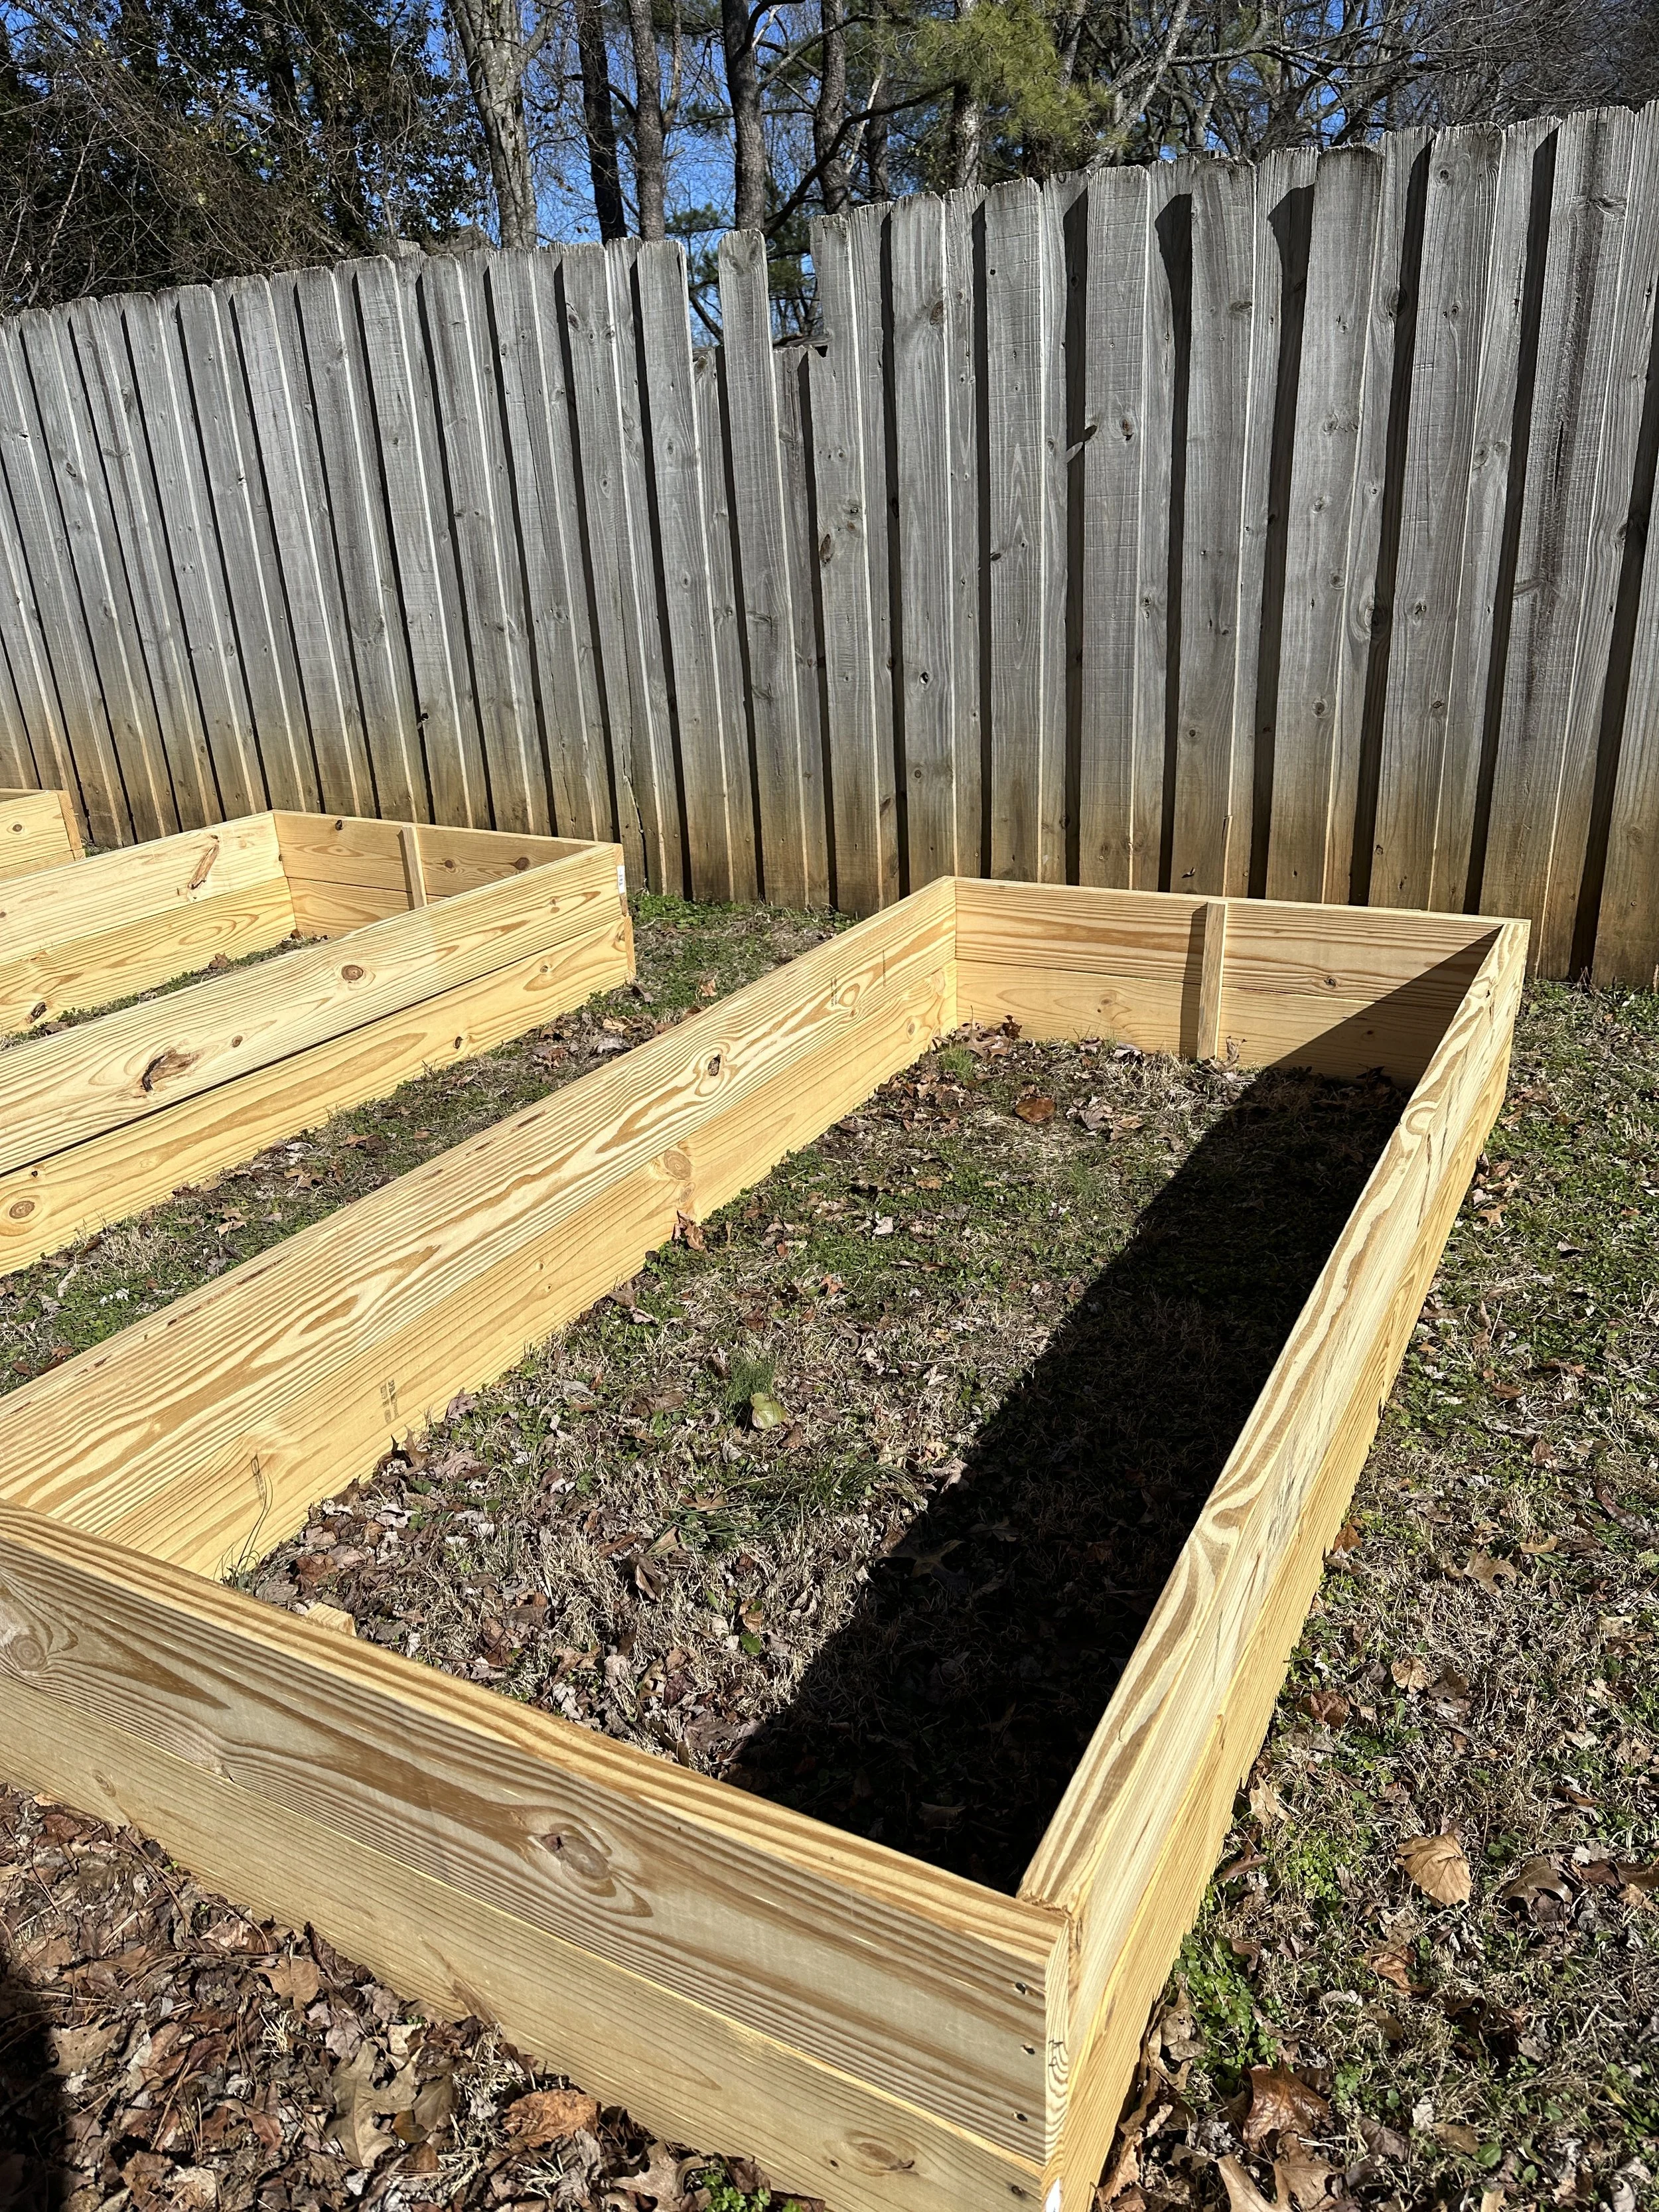
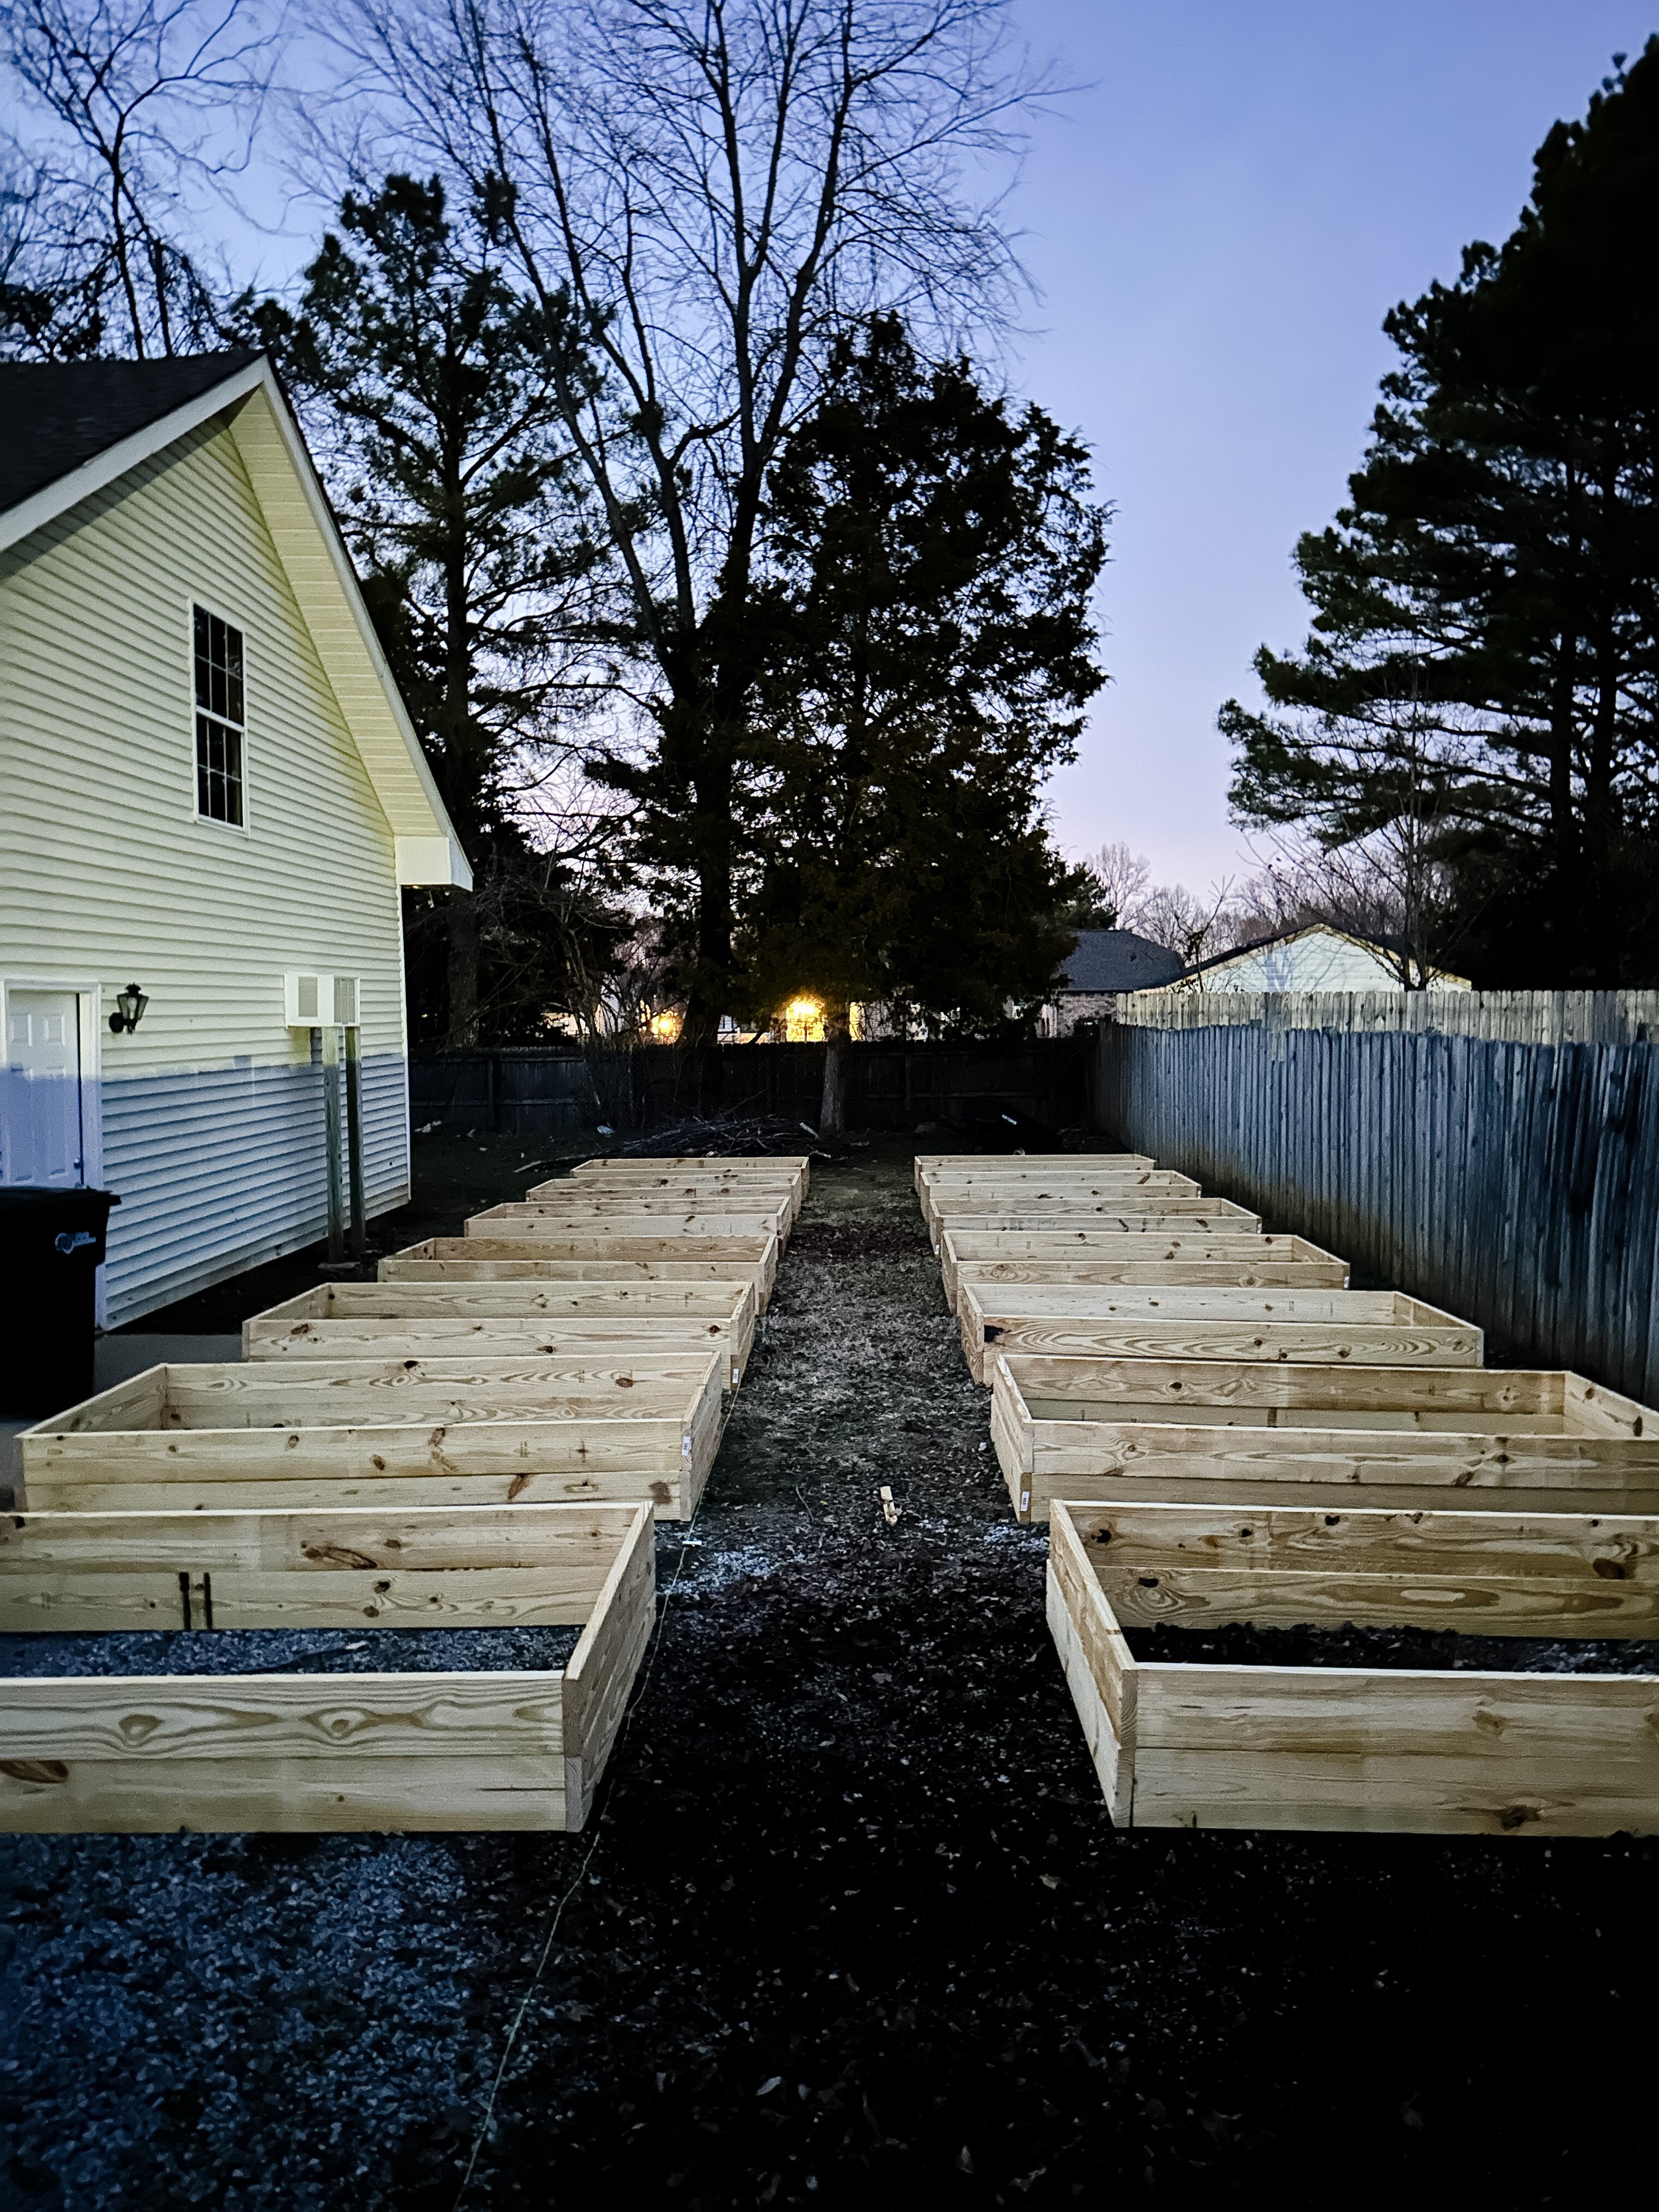
We are building 14 raised beds that are 8’W x 4’L x 16”H each. 10 of them are going to be used for produce and 4 for flowers. I’ll also be planting flowers in the regular garden beds around our house - because I want allll of the flowers! :) We made sure to put the location of the beds in a spot in our yard that gets full sun for the majority of the day.
Since we are doing a good number of them, we wanted to find a cost effective way to build them. While I’ve been studying planting times, Craig took the lead in figuring out how to build raised beds in the most cost effective way we could find. The beds ended up costing about $40 each.
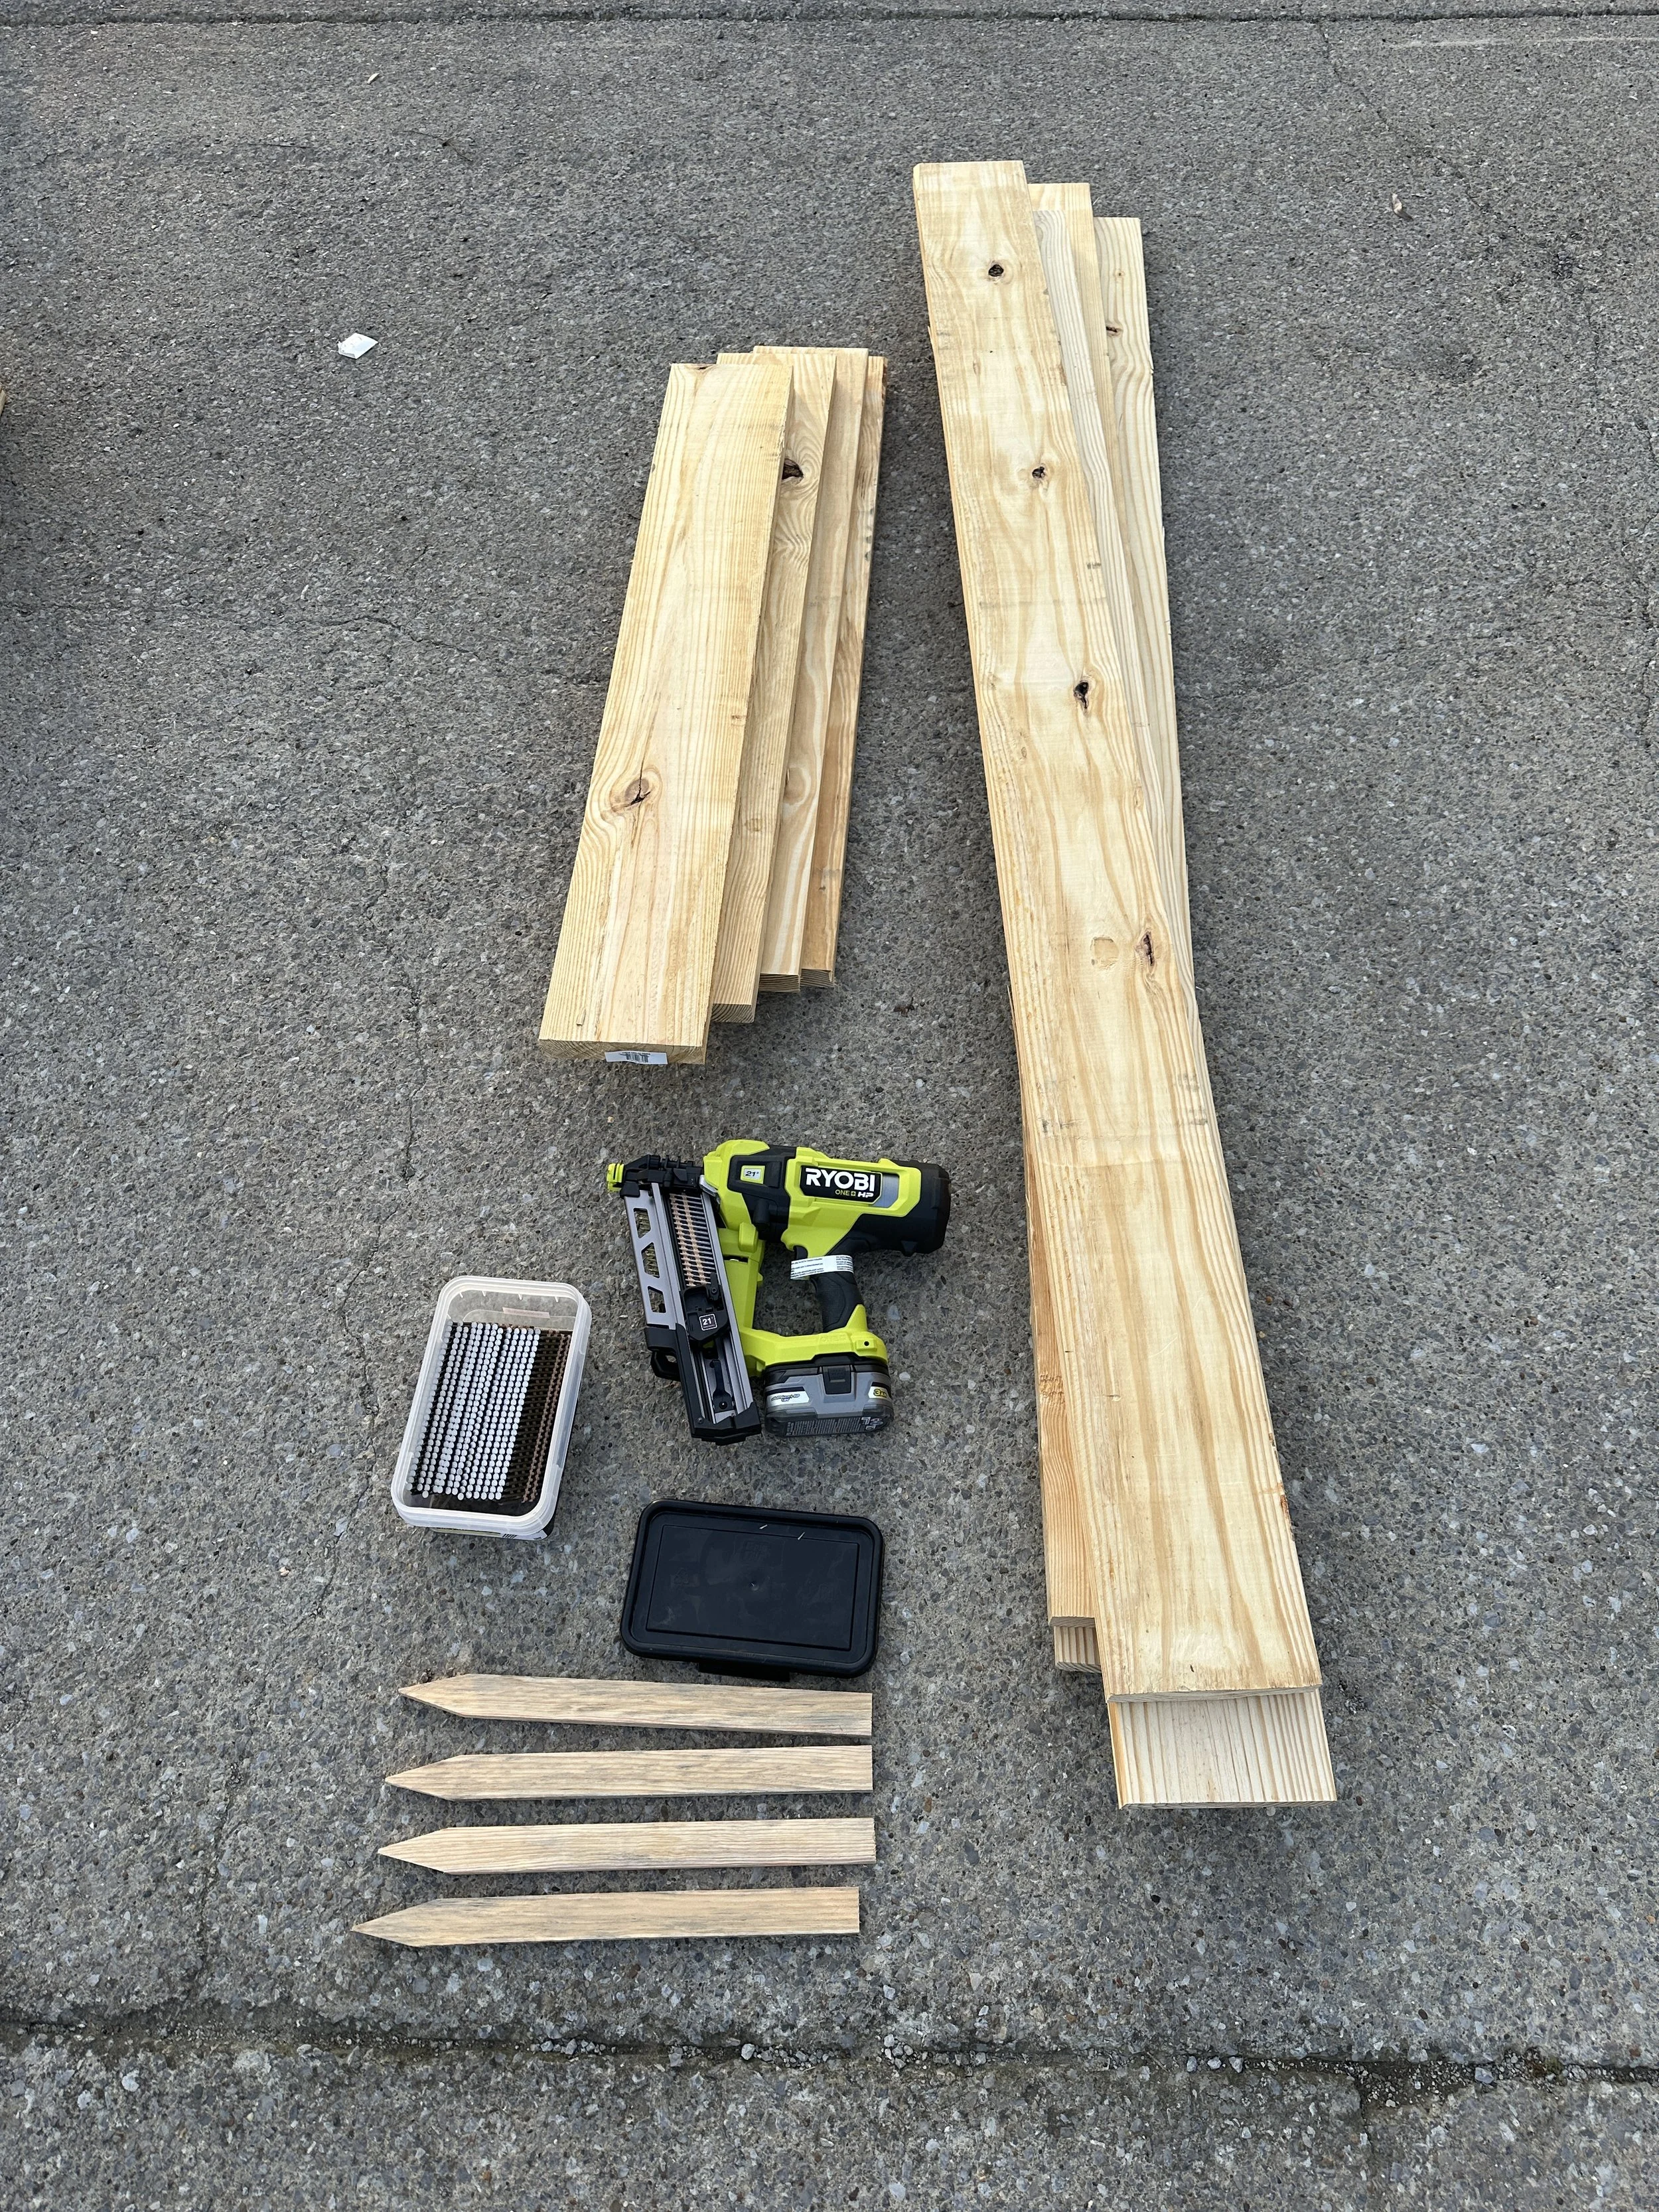
The Materials
Here’s the exact list of the materials we used. I’m going to break this down into a list of what you’d need for one bed and then you can just multiply according to your needs.
(6) 2”x8”x8’ untreated pine boards. Make sure to not purchase treated wood as it can leach chemicals into your soil and not be safe for consumption.
(2-4) 18” stakes
3” nails
Hammer or framing nailer
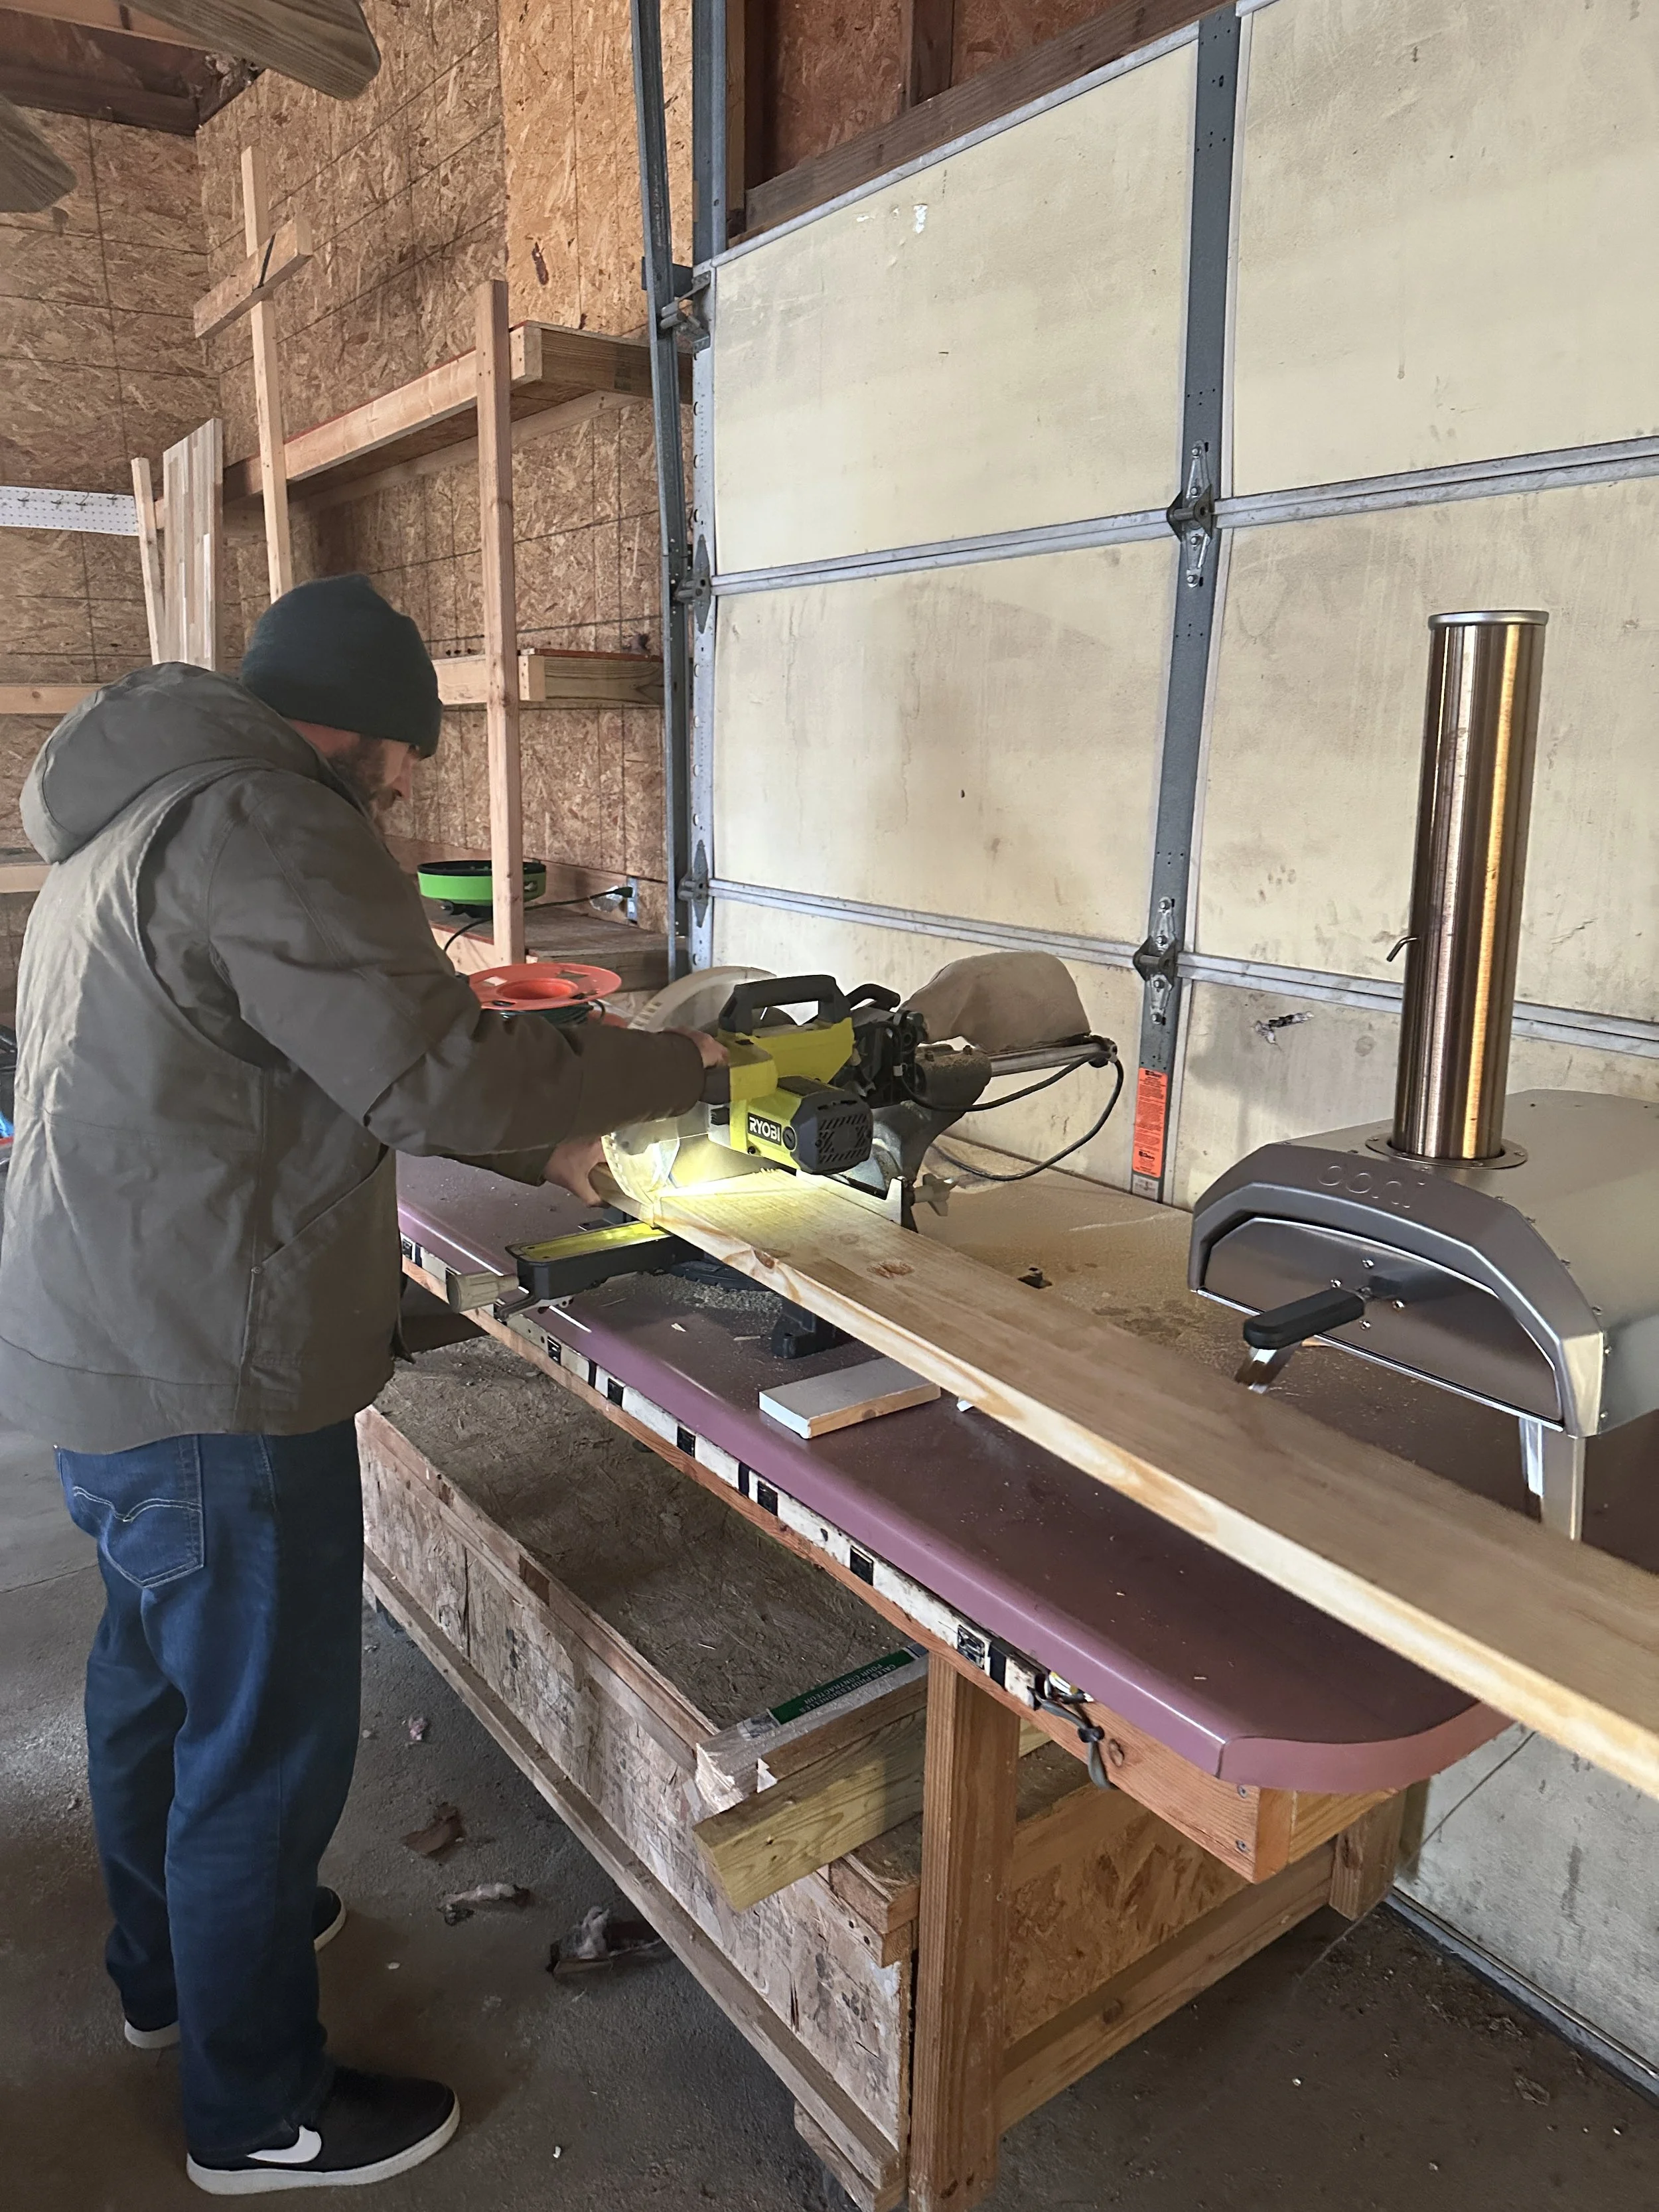
Saw (we used a chop saw, but you could also use a skill saw, table saw etc.)
We did opt to purchase a framing nailer for this project because we were doing so many beds. You could certainly build the beds with a hammer and nails if you are doing fewer of them.
Step 1- Prep your boards
Cut two of your 2”x8”x8’ boards in half to make four 2”x8”x4’ boards.

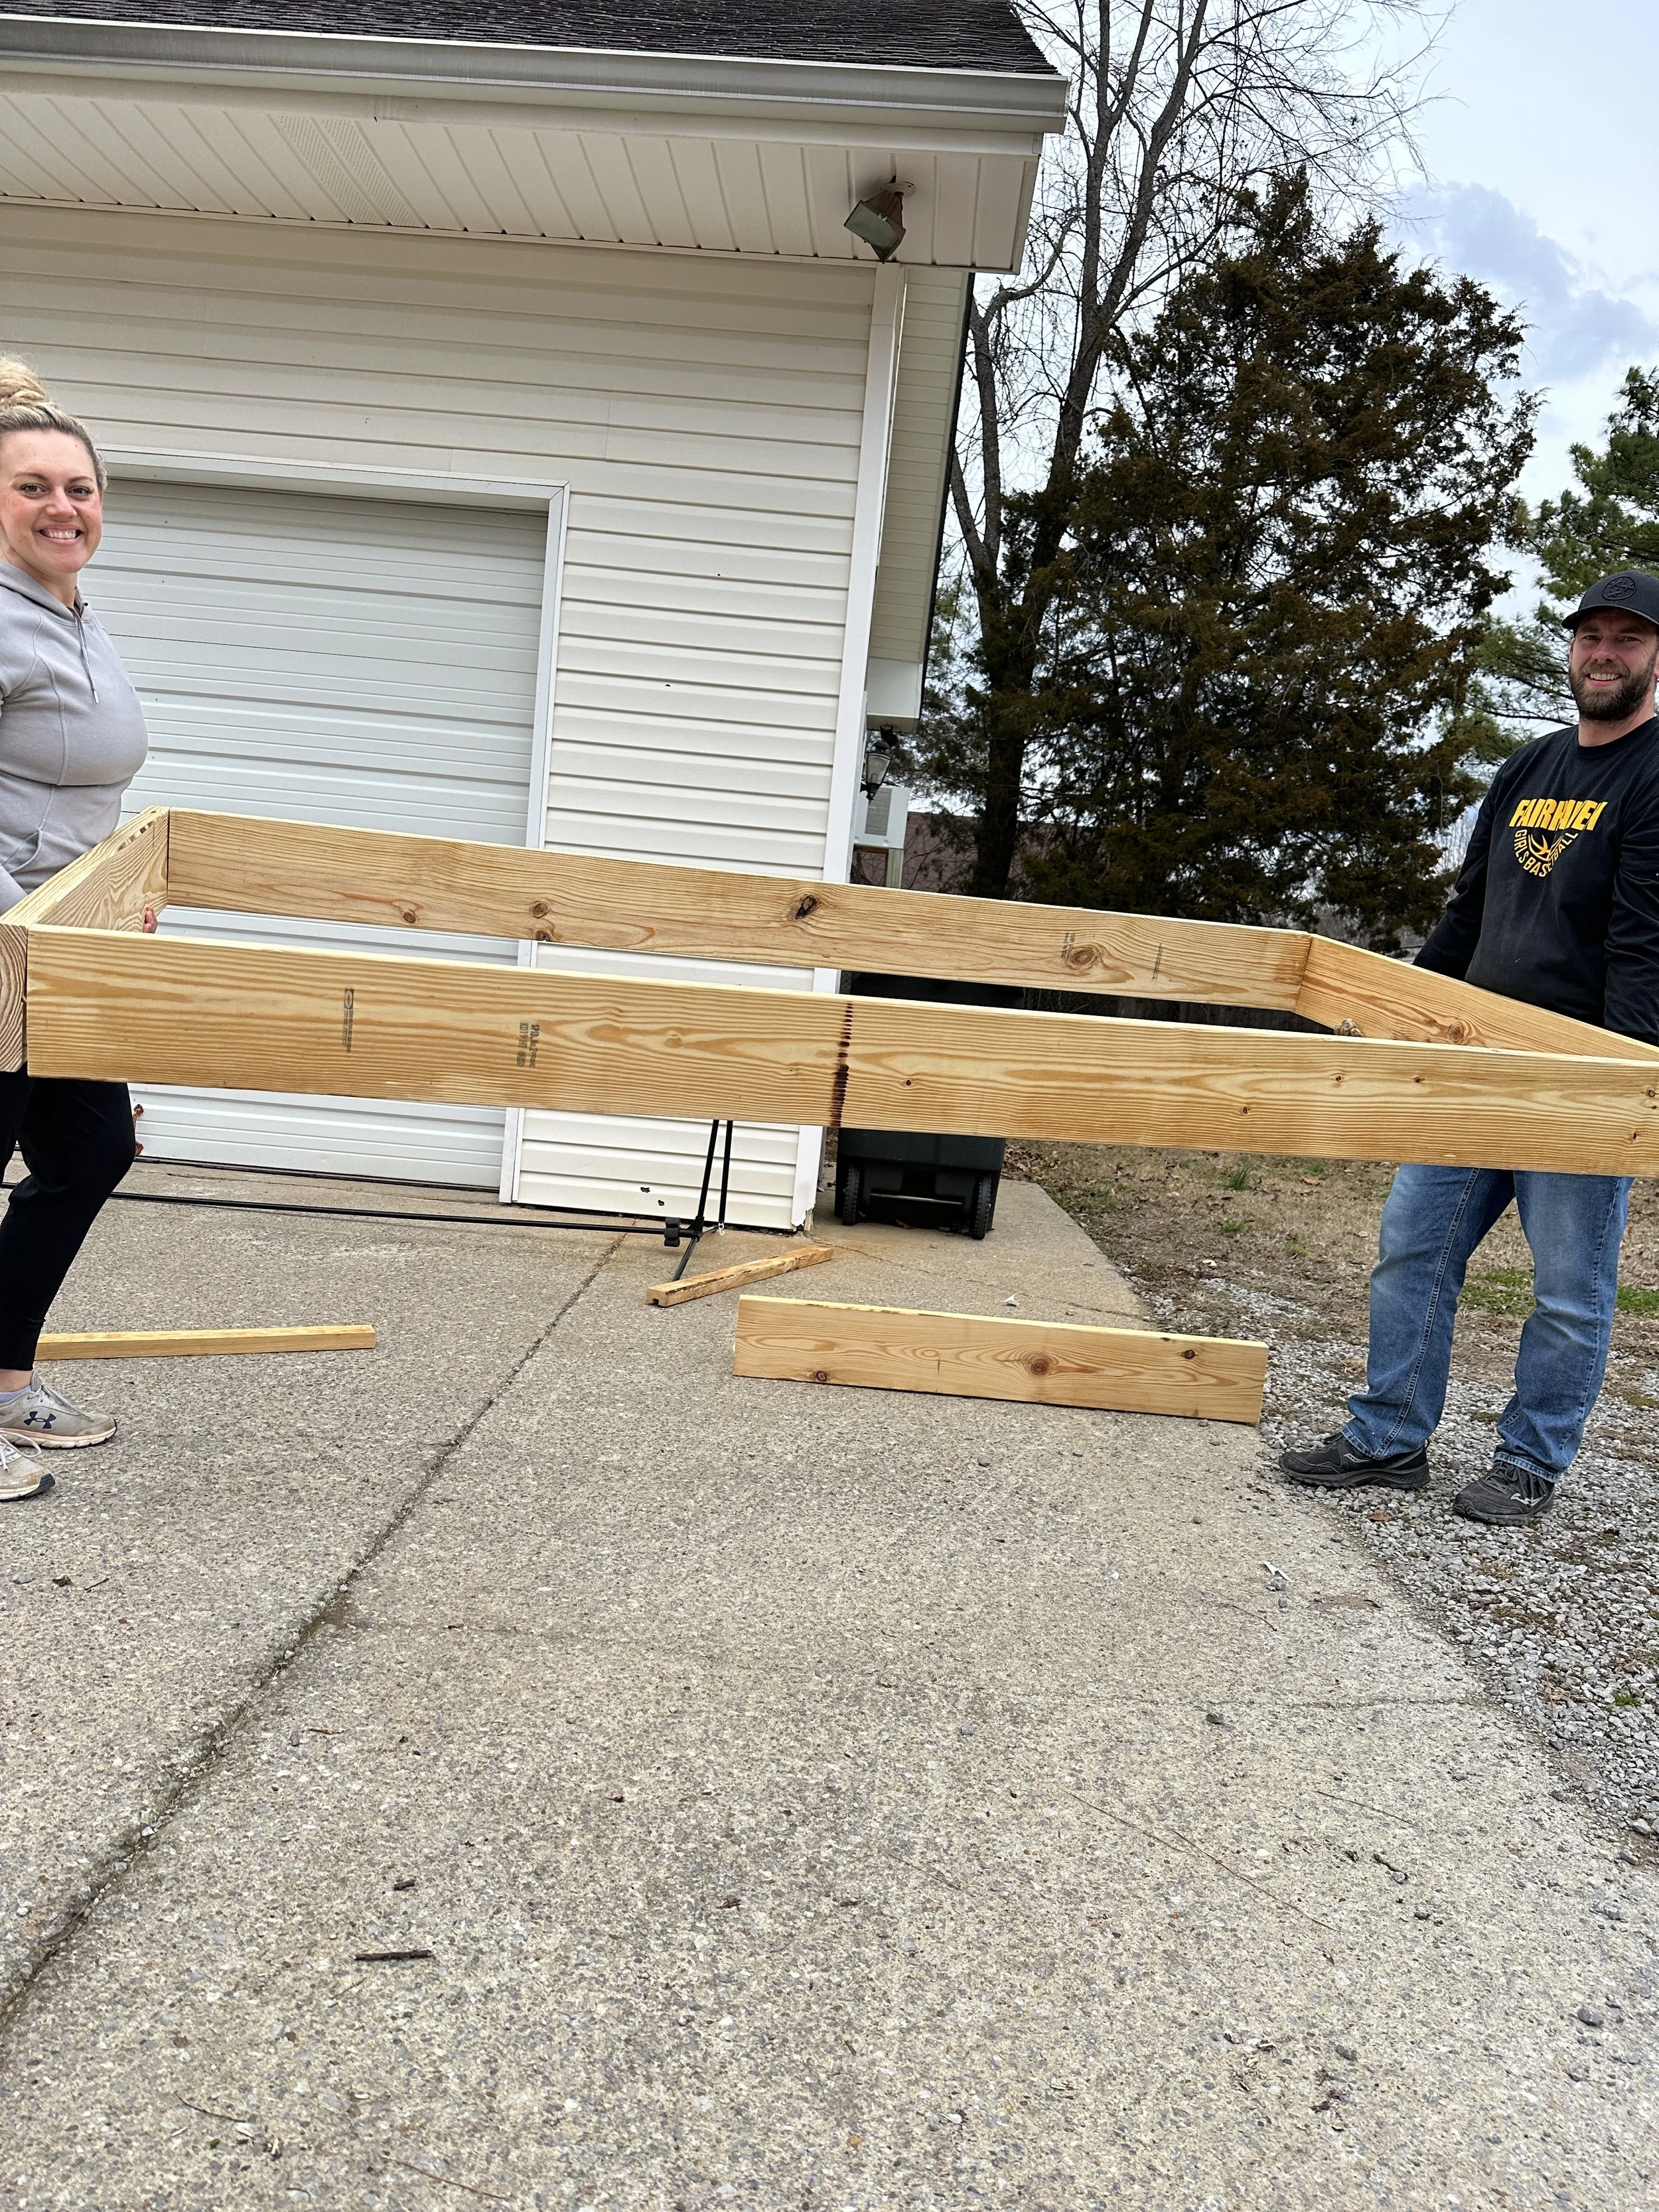
Step 2 - Build your frames
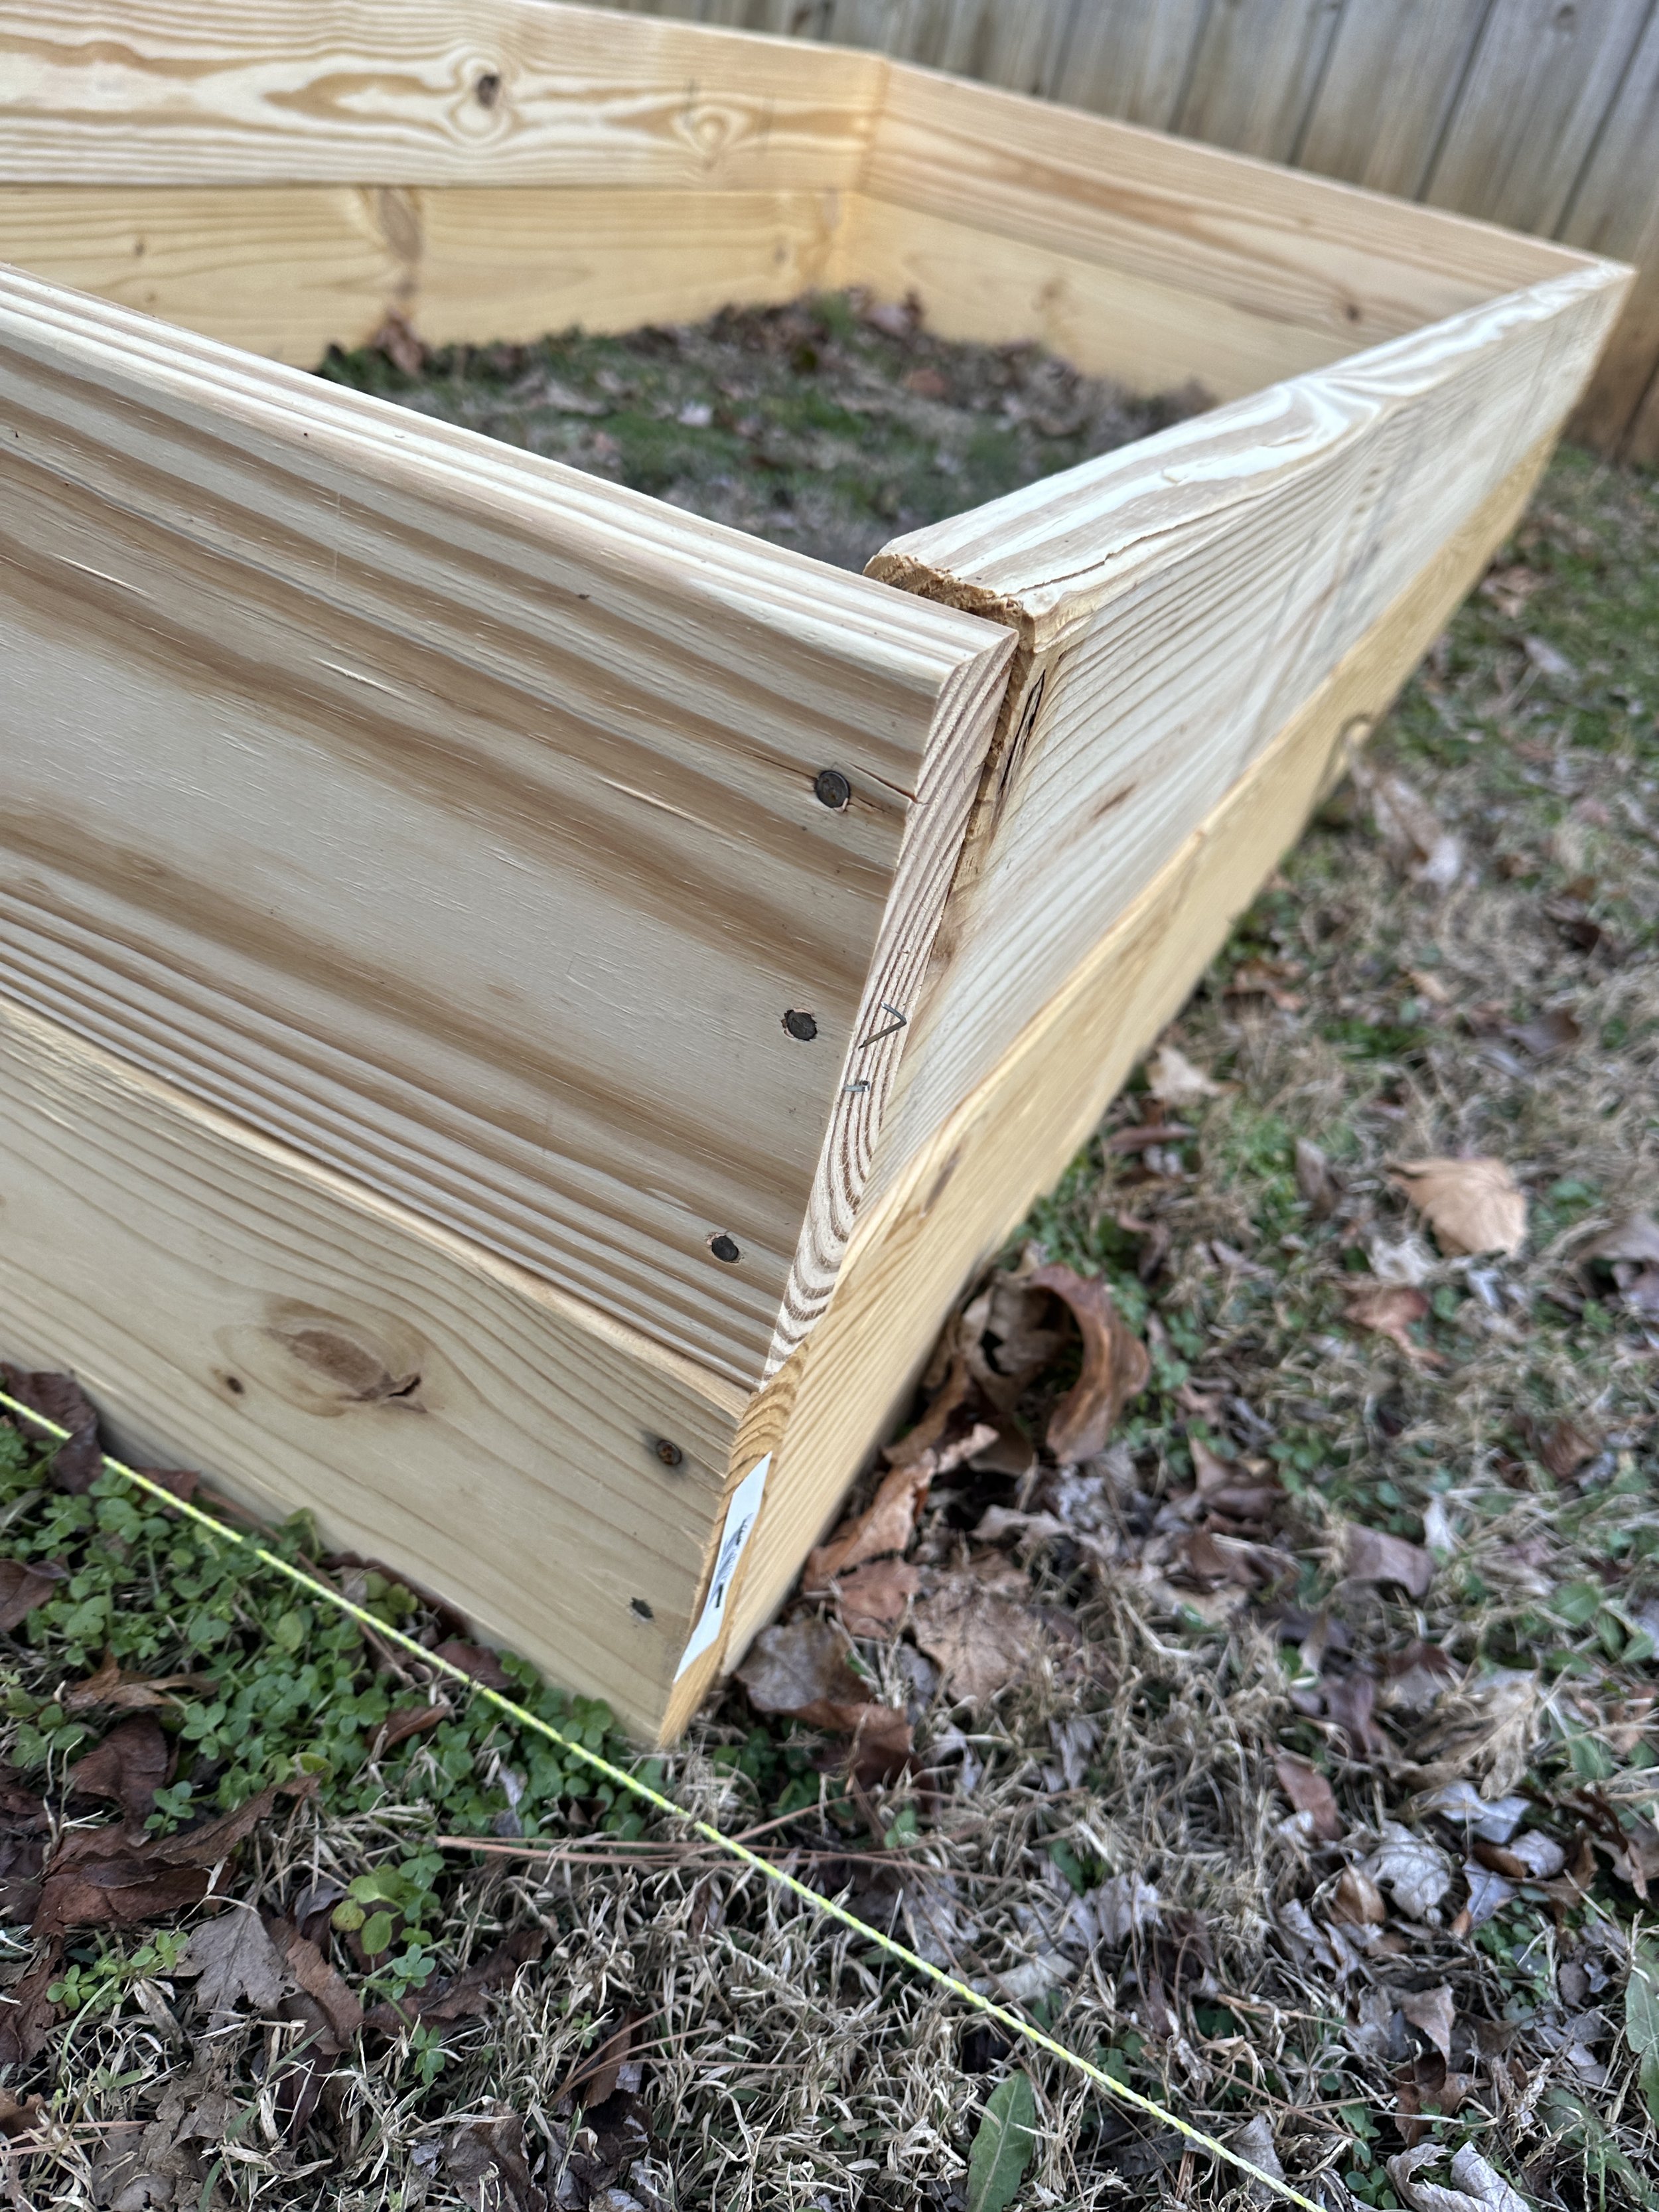
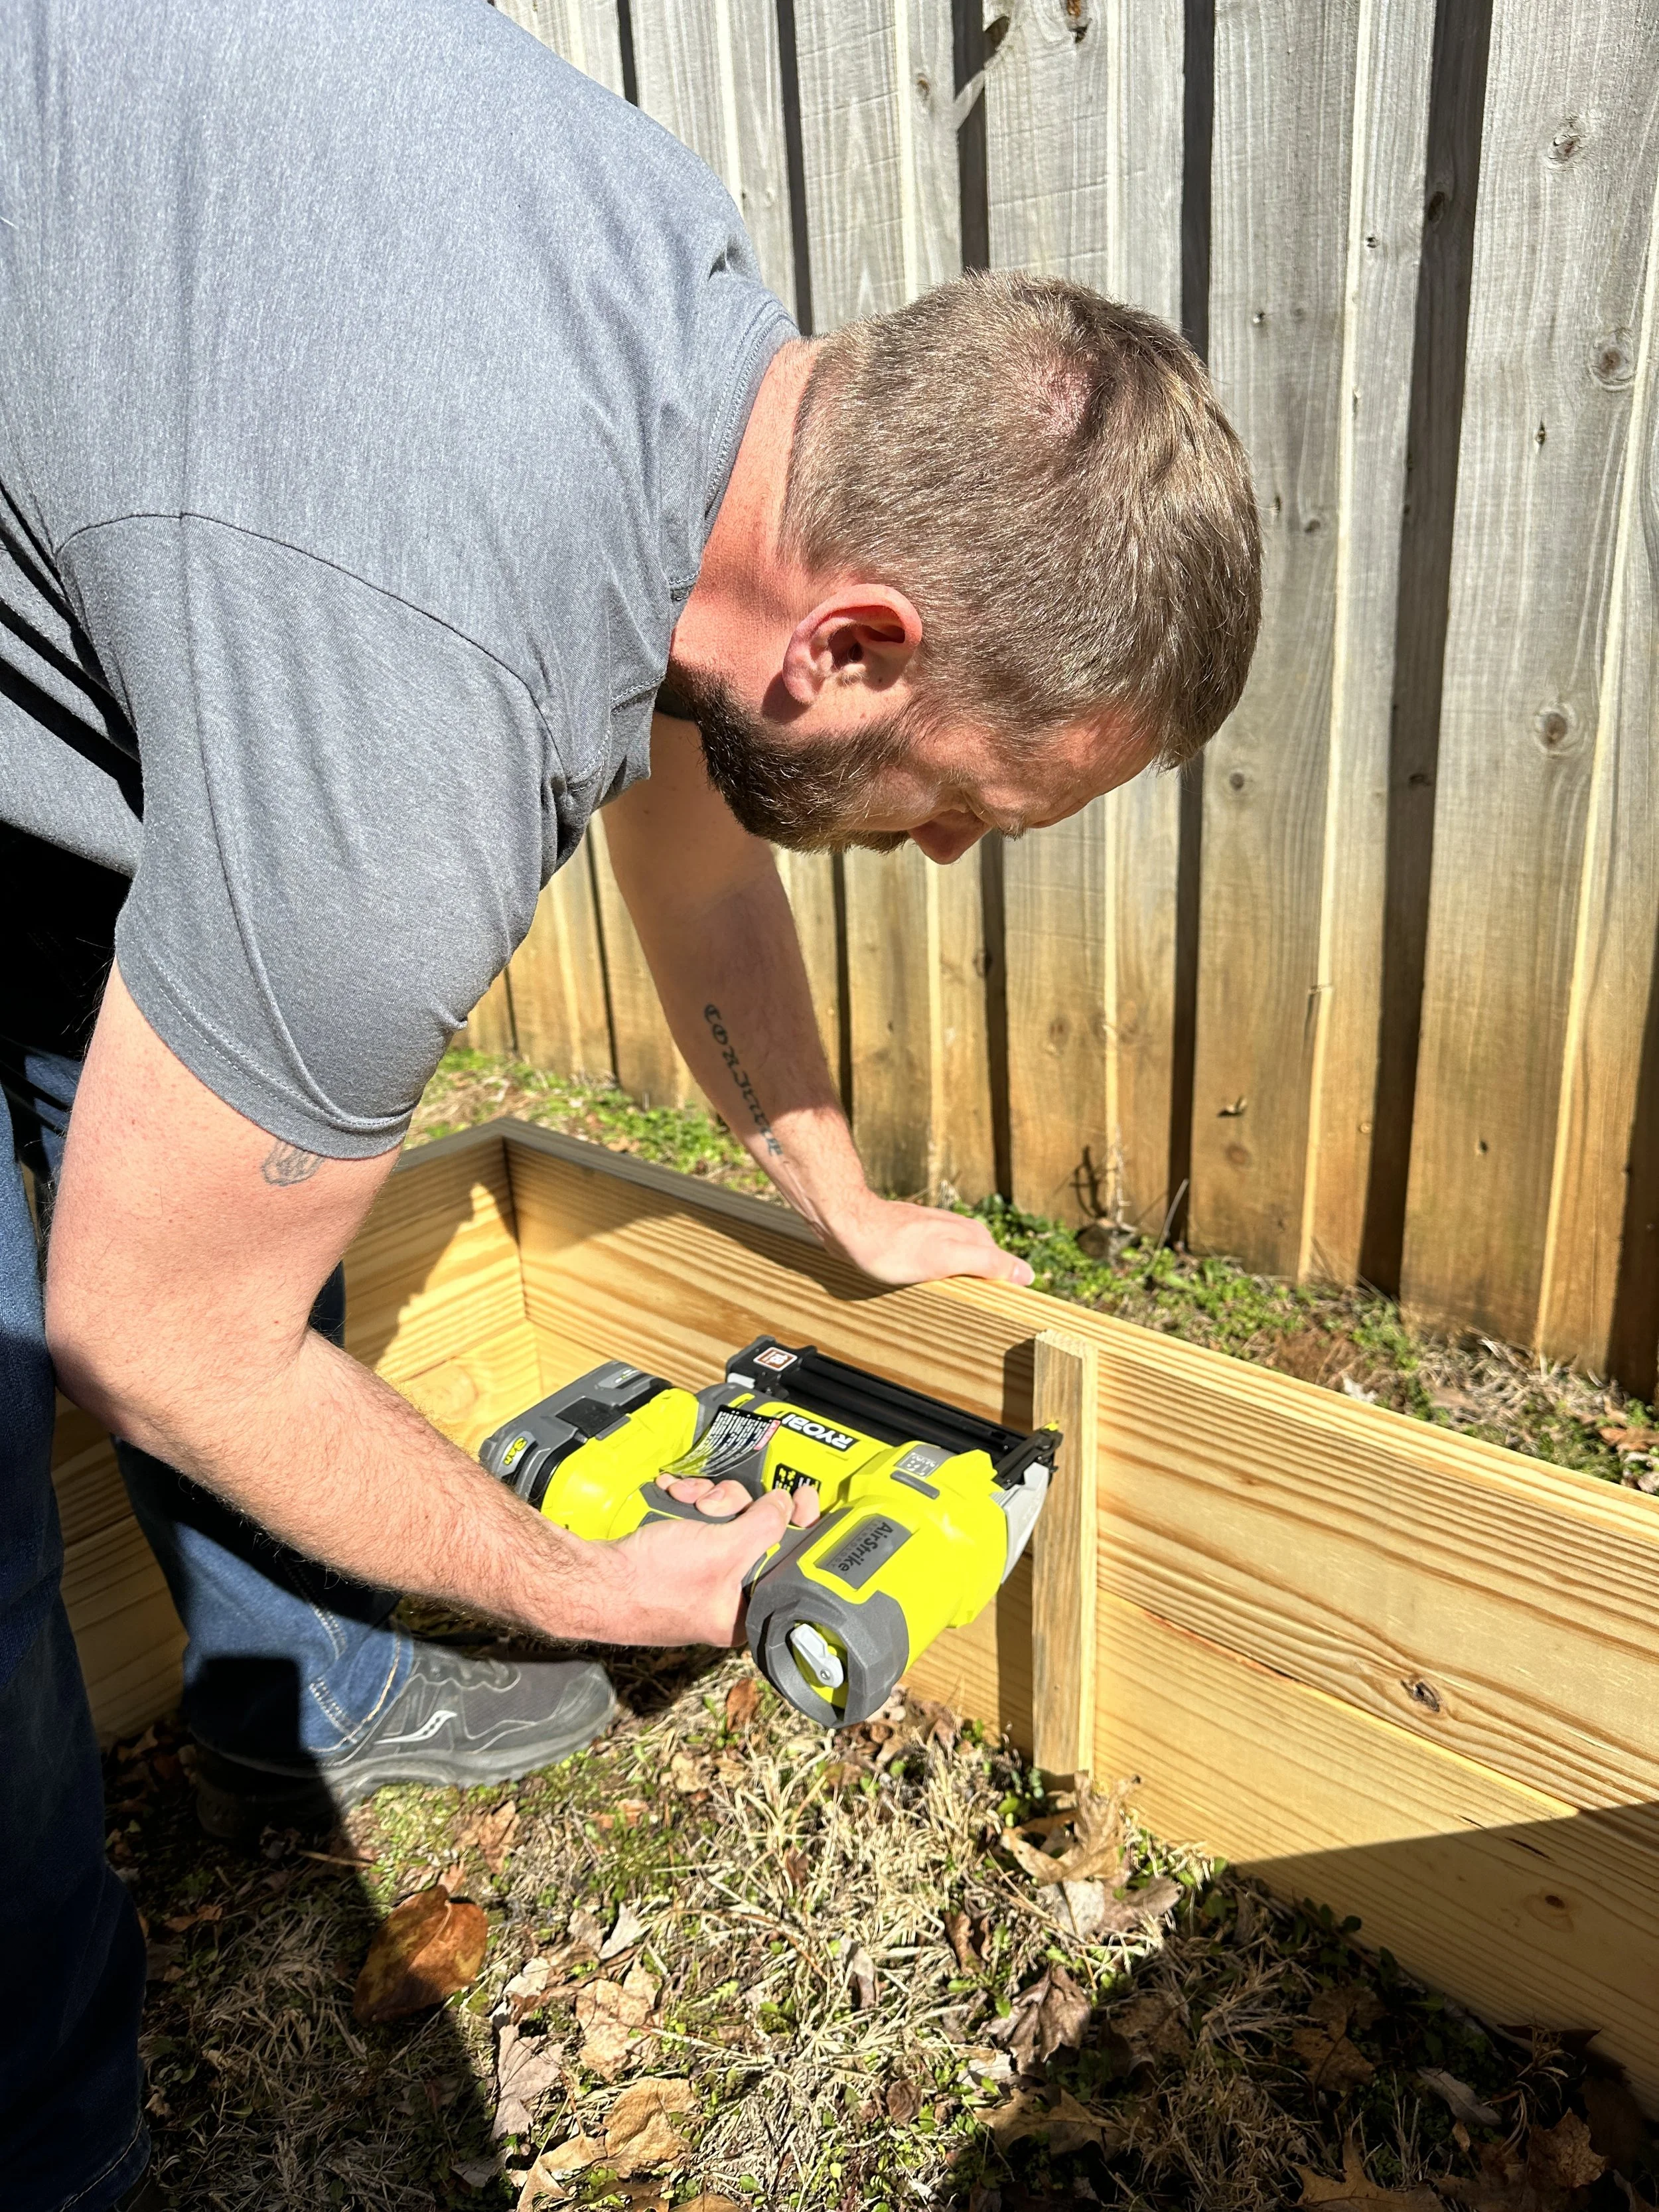
Lay two of your 8’ boards parallel to eachother and attach the 4’ boards to the ends of them like end caps. This will make your frame. We used three nails (top, middle, bottom) to attach the 4’ board to the 8’ board, on each corner.
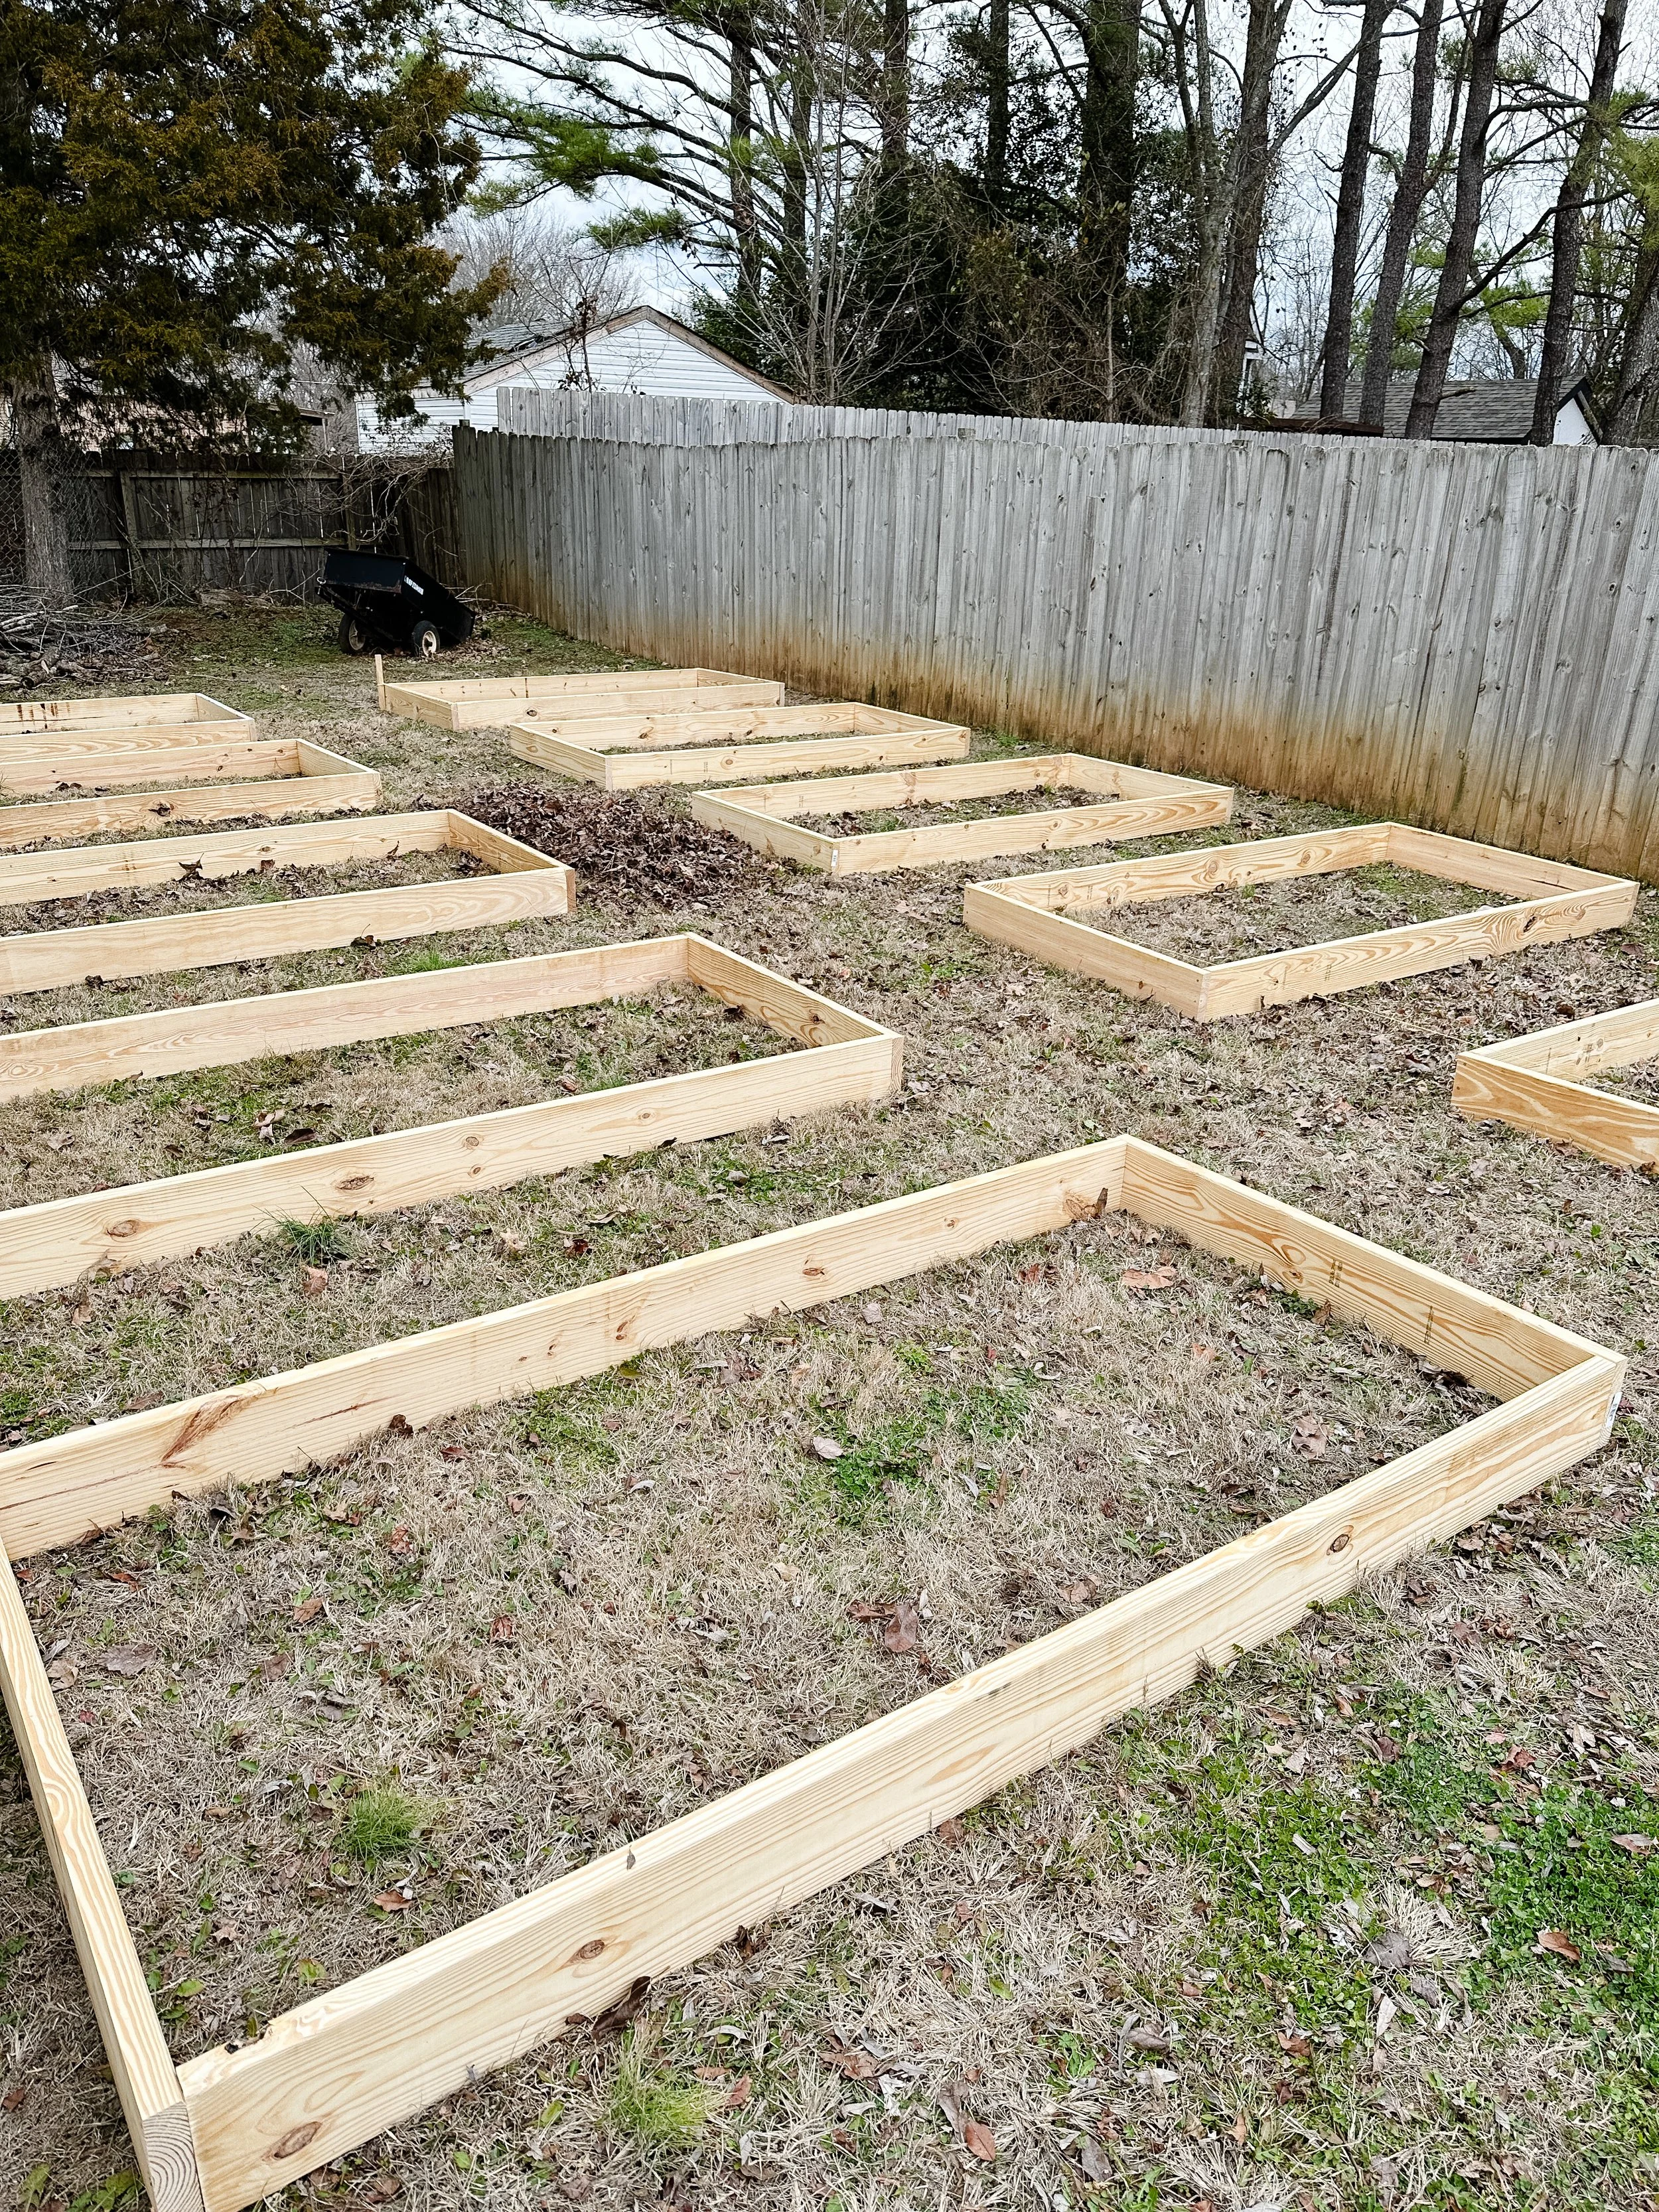
Step 3 - Create your layout
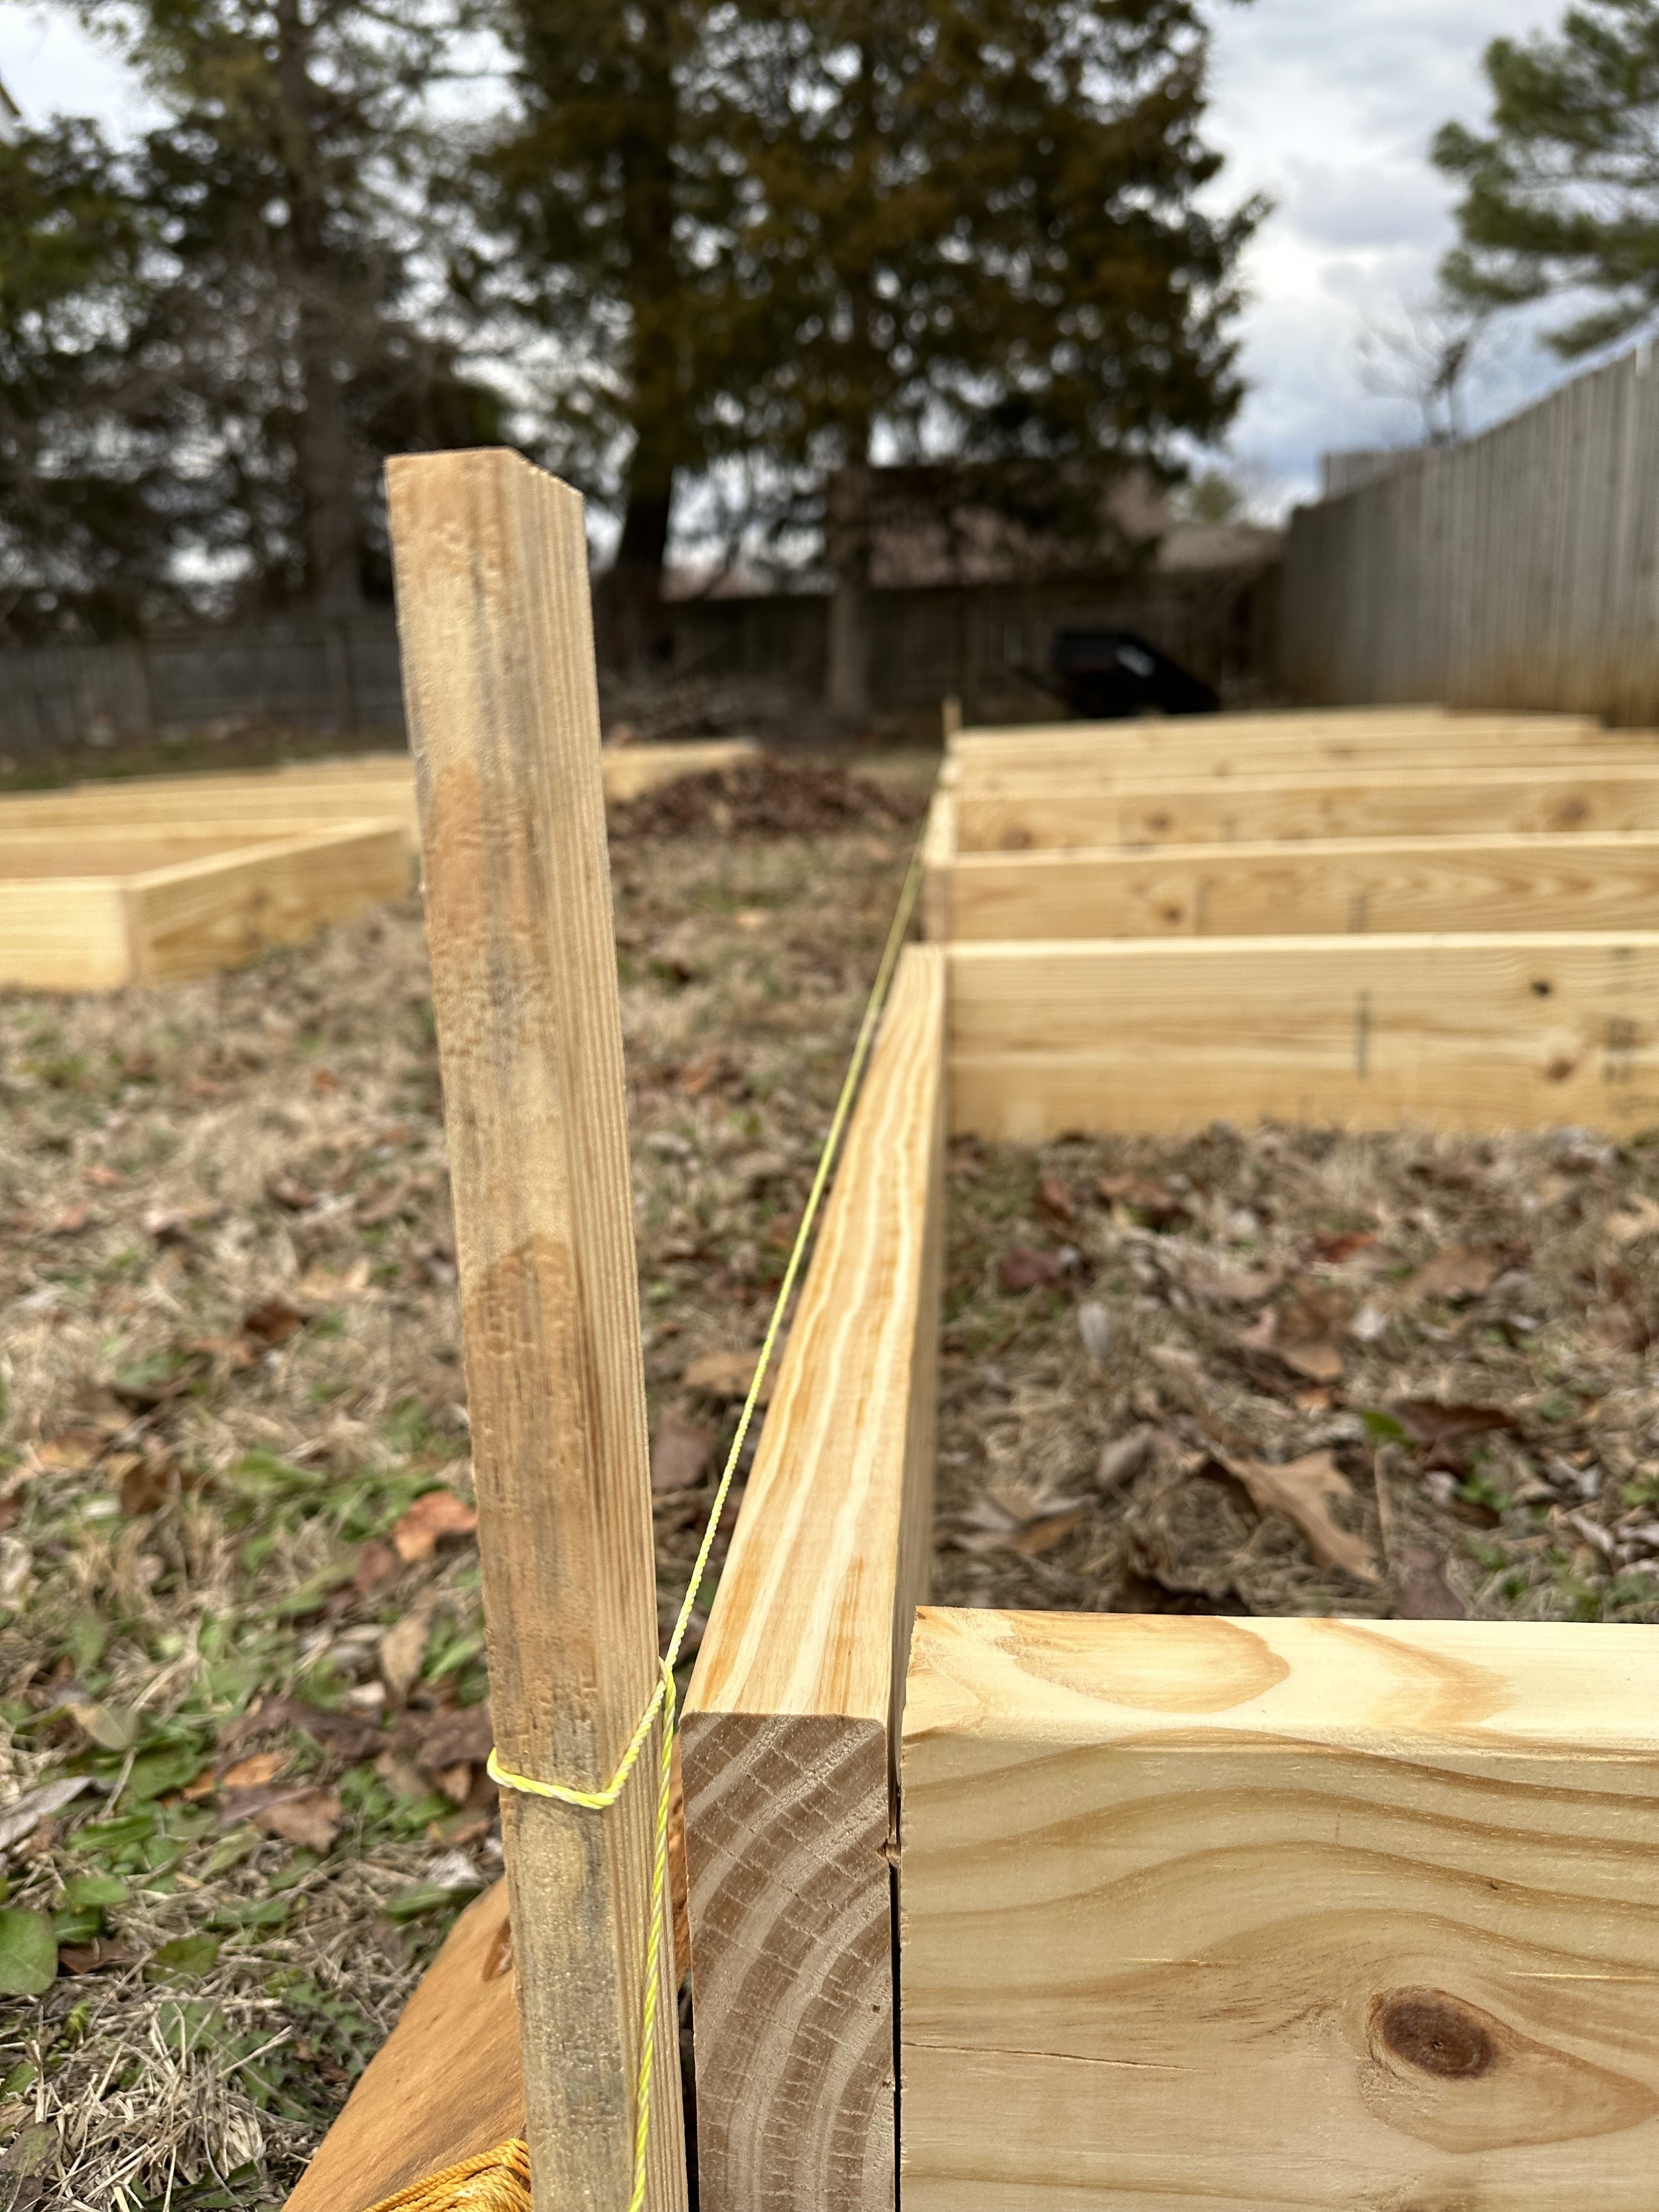
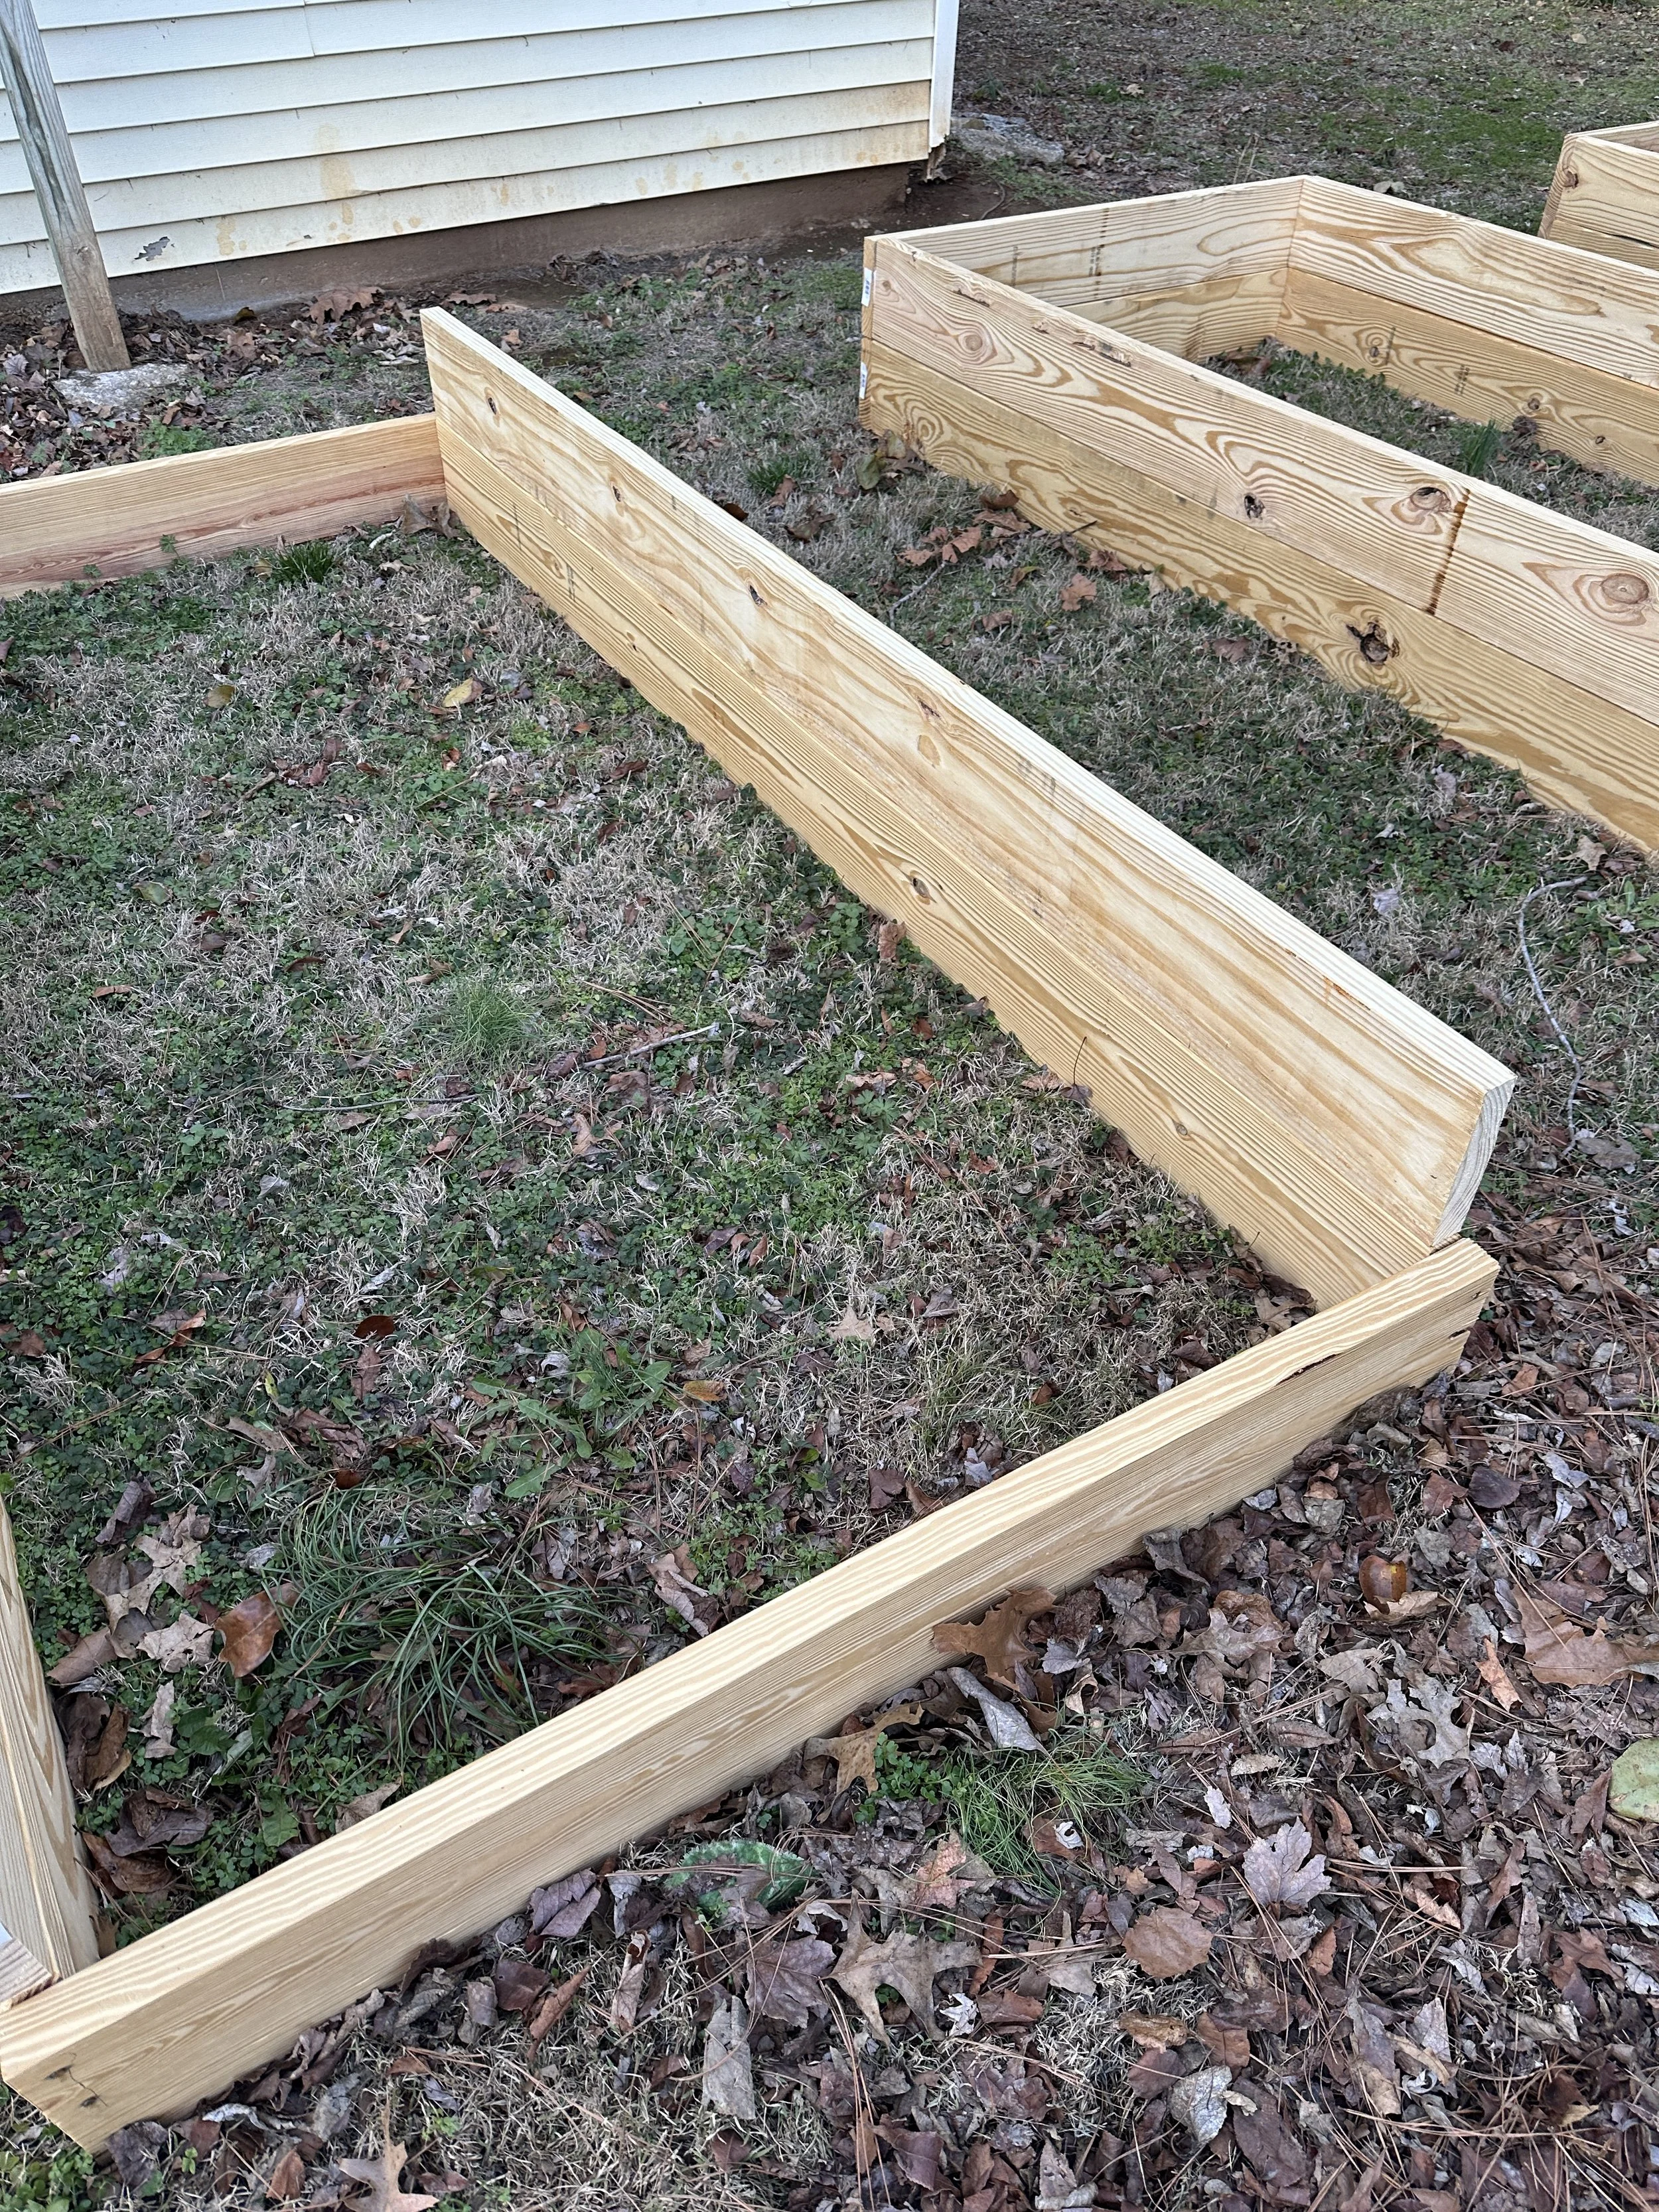
After we built each frame, we layed them out and measure the spacing to ensure our layout was correct. We have a rather long and narrow space that our gardens will go and so we did a center row of 4’ (to ensure a wheel barrow can fit) and each garden is spaced 3’ apart from eachother for easy maintenance. The beds are also 2’ away from our fence. We used twine and a tape measure to assist with straight lines and spacing on uneven grass.
We selected this layout because it made sense with the space we are working with and I wanted the visual of looking down a main row with trellises arching from one bed to the next across some of the rows. (Because you know…I like pretty things.)

Step 4 - Build your second layer
We found it easiest to actually just go ahead and build the second layer right on top of the first. (Remember, these beds are 16” deep and so you need to create that second layer to give them the depth for good roots to establish under your plants.) We layed the boards right on the first layer and nailed them in place.
Step 5 - Secure your layers together
The last step is to secure the top and bottom layers together using the stakes. We used one stake attached in the middle of each side of the bed on the inside. Hammered into the earth and attached with three nails, this keeps the top and bottom frames snugly together in place.
That’s it!
And that’s it! Super simple to do and pretty cost effective. Of course, not as cost effective as just growing right in the ground, but if raised beds make sense for you too, we found this to be a great way to do them! I also love the look of the natural wood frames through the garden.
Stay tuned to learn what we are filling the beds with! I can’t wait to get to planting!
Cheers to you, fellow gardeners!